Set up a surface with detailed queue information
With the Queue Info widget, information displays can show the amount of waiting customers, real and estimated waiting times and open counters. Besides showing the data, it can also notify the watcher visually and with audio when threshold levels are exceeded.
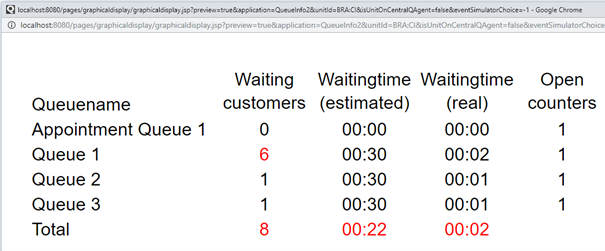
Here is an example of a display where the queue info widget is used:
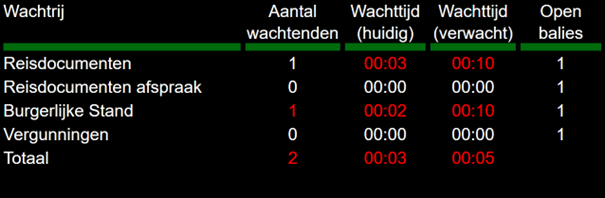
Example of how you can set up a queue info display
Note
For a complete list of all settings, see Queue info widget settings.
Go to Business Configuration > Surface Editor and open an existing surface or create a new surface of the type media display.
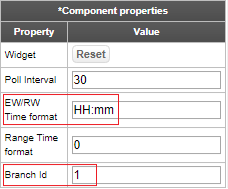
Add the Queue Info widget to the surface.
Set the branch ID and a time format for EW/RW Time Format. Alternatively, set a range time format, meaning the time is shown per step of X minutes.
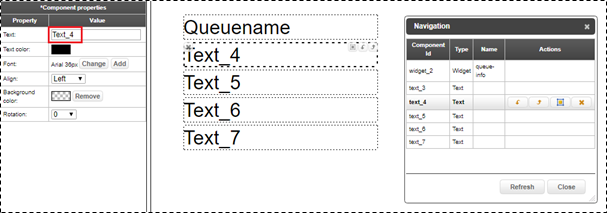
Drag text components to the surface, for example headers and column rows. Rename them to match the component ID to make them easy to identify. To find the component IDs, click Navigation in the top of the screen.
Configure the settings for each queue (1–10) and for the branch total. Link text components to the queues by using the exact component ID (case sensitive). For this, you will also need the queue IDs. See Obtain queue IDs.
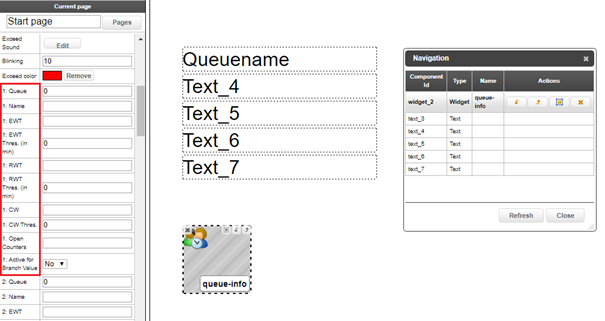
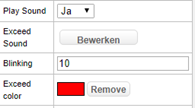
For some parameters, you can set a threshold value. When the threshold value is exceeded, the system will send out a warning. Configure the settings Play Sound, Exceed Sound, Blinking and/or Exceed Color.
The setting Use Active Queues lets you decide whether you want to show the totals for all queues where you set Active for Branch Value to 'Yes'. If you set the Use Active Queues to 'No', the totals are based on all queues in the branch.
You can always preview the result by using the preview feature.
Obtain queue IDs
The Queue Info widget can show information from up to 10 queues. If you have more than 10 queues in a branch, you need to determine which queues to display. For this, you need the queue IDs for the queues you want to display.
In Business Configuration, go to Branches and select a branch.
In the URL, you can see the ID of that branch, which is needed to obtain the queue IDs.
Enter the following URL in the browser to get the queue IDs:
http://<visit_manager_url>/qsystem/rest/servicepoint/branches/<branch ID>/queues/
For example:
https://company.visit-manager-admin.qmatic.io/qsystem/rest/servicepoint/branches/1/queues/
The result should look something like this:
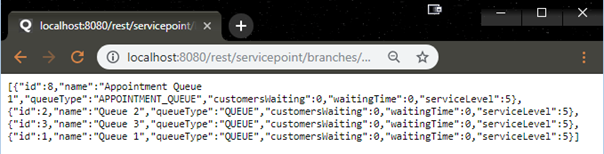
Here you can see the queue names as well as the corresponding IDs. These will be used when setting up the widget.