Managing queuing profiles
A queuing profile handles the queuing logic and contains all settings for how your organization should serve customers in the most fair and efficient way. In a queuing profile, you can configure the following:
Service groups: organize service in service groups to determine in which queue a visit should end up when a customer selects a service.
Segmentation rules: define segmentation rules to have a more fine-granular segmentation of visits into queues based on for example language, VIP level and visit type (appointment or walk-in).
Work profiles: set up from which queues to call from and in which order based on conditions and calling rules.
You can manage queuing profiles in Business Configuration > Operation Profiles > Manage Queuing Profiles.
Organize services in groups (queuing profile)
For services to be available in a queuing profile, they need to be added to a service group. Service groups are a way of grouping services with similar qualities, e.g. that the one staff member has the competence required to serve them. A service group can consist of only one service, or several services. A service can however only belong to one group. For each service group, a queue is created automatically.
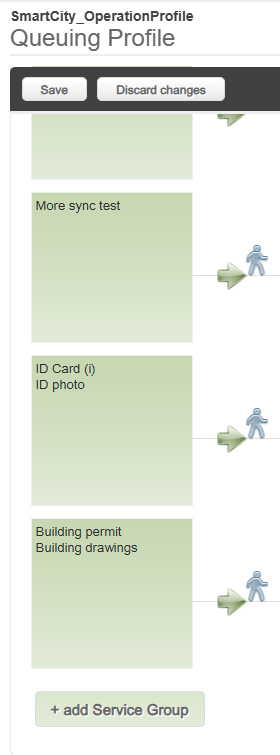
To add a service group:
Click Add Service Group.
Select the services to include in the group.
Click Ok.
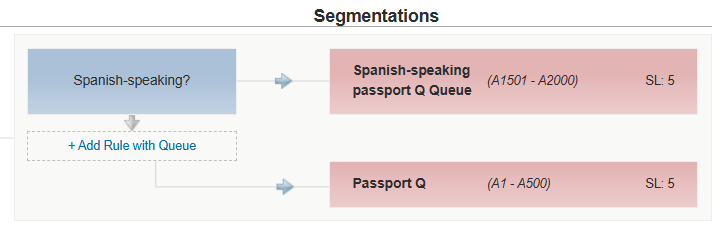
Add segmentation rule
Segmentation rules are an extra layer that puts customers into different queues based on for example language of if the customer has booked an appointment. Read more about segmentation rules.
In the queuing profile, click Add rule with queue.
Give the segmentation rule a name which makes it easy to identity.
Select a rule and optionally add more conditions to the rule.
Click OK.
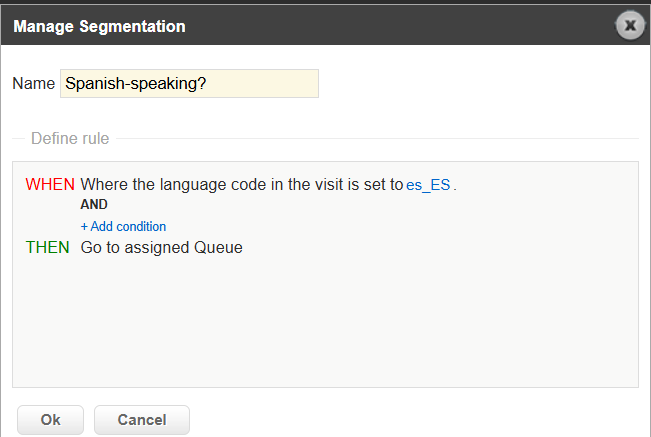
When you have added the segmentation rule, a queue is automatically created. Remember to change the Manage queue settings.
Manage queue settings
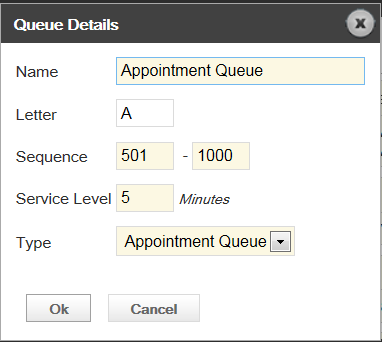
Queues are automatically created when you create a service group or add a segmentation rule. For each queue, you can change the following settings:
Letter and sequence: When a visit is placed in a queue, it gets a ticket number. The ticket number is made up from the letter + number sequence for each queue, e.g. A001.
Service level: This is the maximum time it is considered OK to wait in the queue. It is used in many places in the system, such as:
warning alerts to staff, both sent as SMS/email and visible in staff applications
work profiles, who can be configured to call from the queue that is closest to the service level
reports, where you for example can see how many customers had a waiting time above the service level.
Queue type: Normal or appointment queue. The difference between an appointment queue and a normal queue is that visits in an appointment queue are sorted according to the appointment start time. Also, the visit lifetime and the waiting time in an appointment queue is based on the appointment start time.
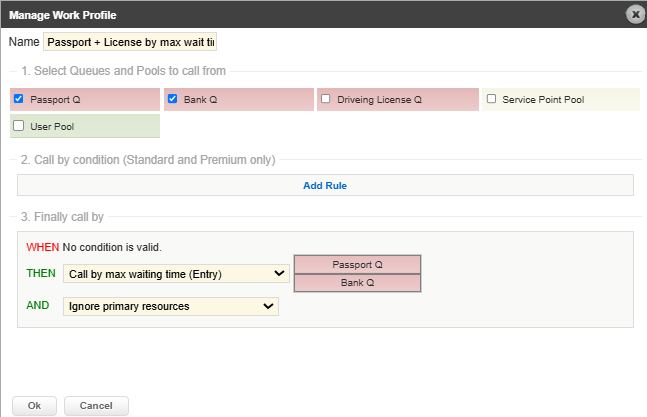
Set up work profile
The work profile defines from which queues and in which order to call customers. It contains which queues (and pools) to call from, default calling order and conditions that results in exceptions from the default calling order. Read more about calling rules and conditions.
Click Add work profile.
Give the work profile a name. The name should make it clear what the work profile is used for since this is what staff users see when logging in to the Serve view.
Select which queues and pools to call from.
If you want to use conditions, click Add Rule and configure your conditions.
Configure the default calling order in the Finally call by section.
Click Ok.