User guide: Plan view
To get an overview of the resource capacity and availability, go to the Plan view. Here you can:
see the capacity of resource pools
temporarily change the capacity for virtual resource pools
see when specific resources are booked and when they are available
change the availability of specific resources.
Landing page overview
Here is an overview of the landing page in the Plan view.
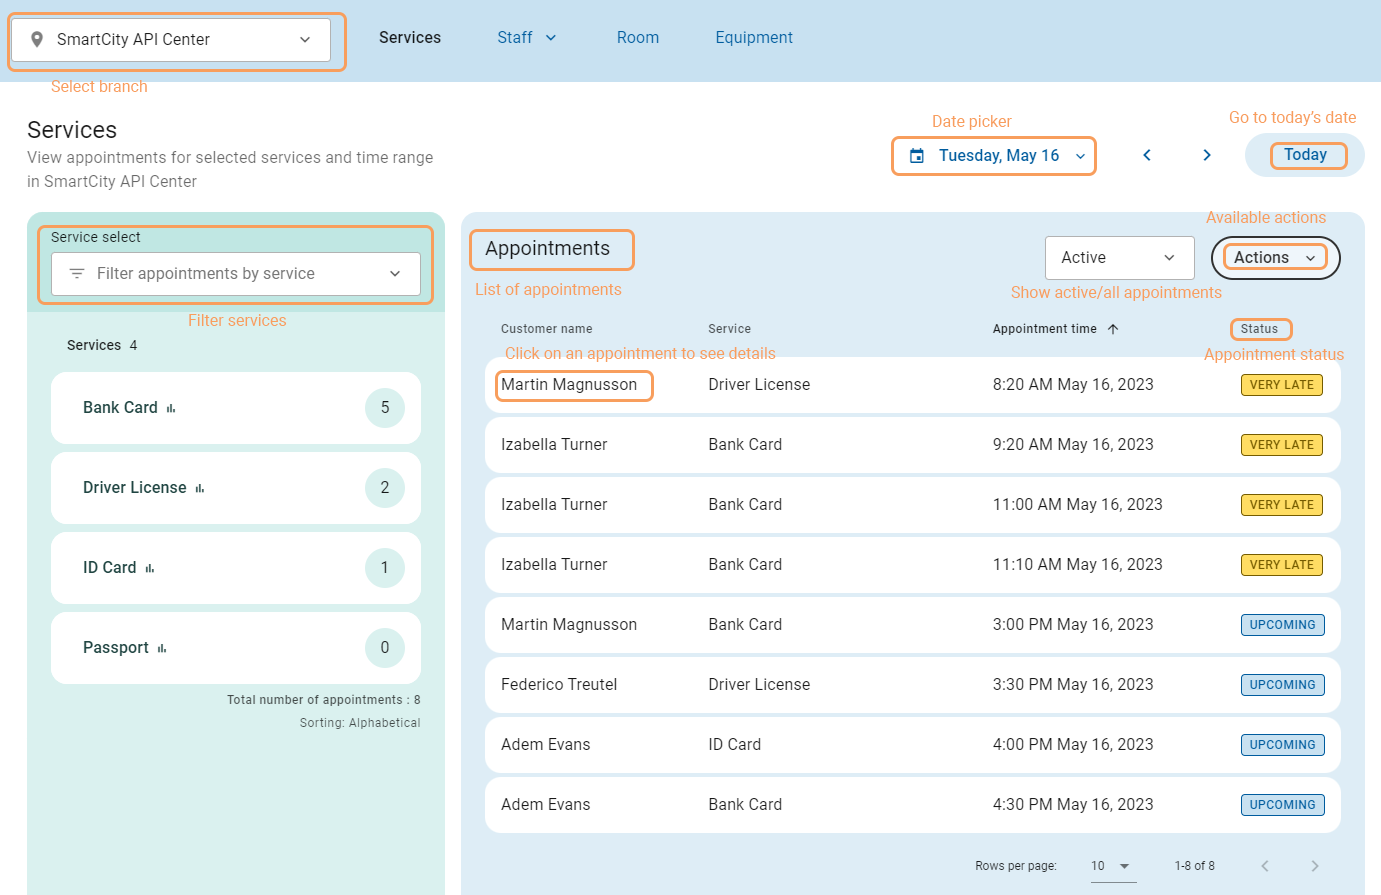
Select branch – Select a branch from the drop-down list.
Filter by service – You can filter the list of appointments by service, either by clicking anywhere in the white area next to the service name, or, if you have many services, by searching for them.
Date selection – Use the date picker to select another date or time range for the list of appointments.
Today – Use this button to go to today's date.
Active/All filter – Filter the list of appointments by choosing to see only active appointments, only canceled appointments, or all appointments.
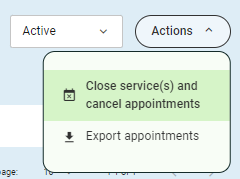
Actions – From the actions menu you have the option to close services temporarily and export the list of appointments.
Appointments – A list of appointments for the selected time range. By default it shows all appointments for today's date, including those where the appointment time has passed.
Appointment details – Click on an appointment to see the appointment details and to reschedule or cancel the appointment.
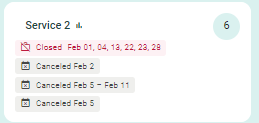
In the list of services on the left-hand side, you can see if the service has been closed or canceled any day during the selected time range.
Manage resource pool capacity
To see the capacity of resource pools, select a branch, and then select to see either a staff, room or equipment pool from the menu.
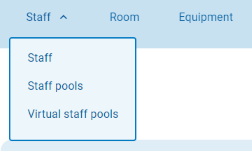
If you have both pools with specific resources and pools with virtual resources, you will have both options in the sub-menu.
Resource pool capacity overview
To see the capacity of a resource pool, select type of pool from the sub-menu and then select a pool from the list of pools.
The resource pool capacity can be shown per day, week or month. It's also possible to select a custom range.
The day and week view shows the actual number of booked appointments and capacity of the resource pool:

The red bar shows the number of booked appointments.
The blue bar shows the resource capacity based on the availability of resources, including temporary deviations of the capacity done in the planner view.
The dashed line shows the baseline capacity, i.e. the capacity that is scheduled in the appointment configuration.
To toggle between showing the full day and showing only working hours (06.00–20.00), click Zoom in/Zoom out  . For the week view, you can also toggle between showing only working days (Monday–Friday), and showing the full week.
The month view shows the number of booked appointments as a percentage of the resource capacity, where one bar represents one day:
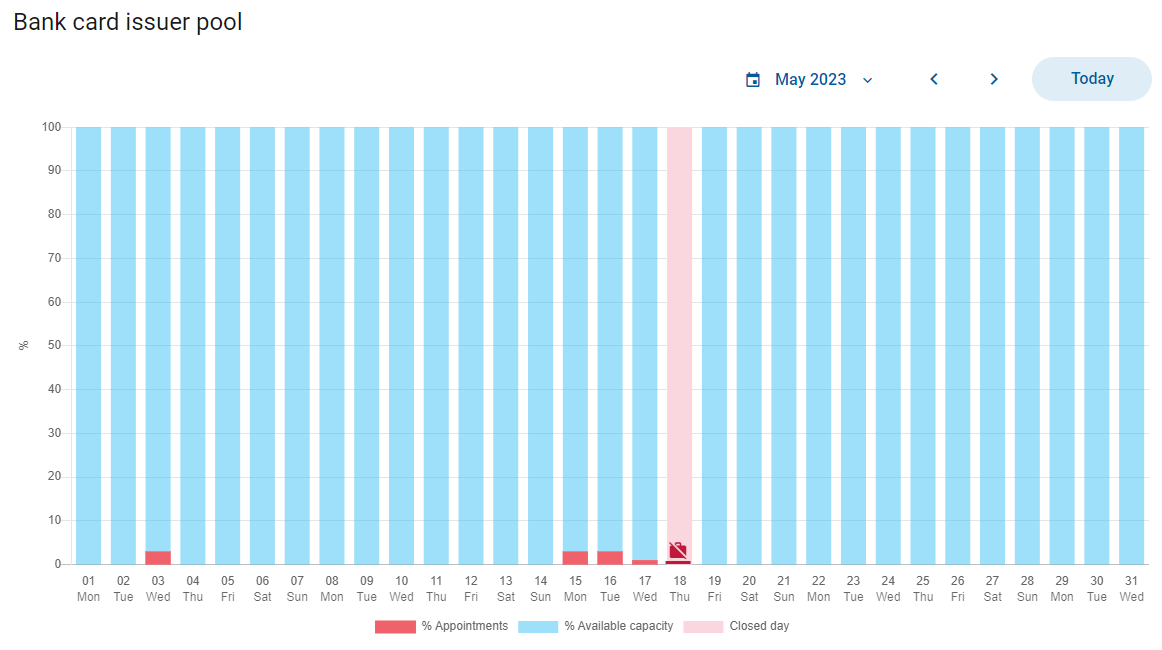
The red bar shows the percentage of the resource capacity that is booked.
The blue bar shows the total resource capacity, and is always 100 %.
The pink bar shows a closed day.
Change resource pool capacity
Note
You can only edit the resource pool capacity for pools with virtual resources.
Changing the resource pool capacity means that you increase or decrease the number of available resources in a pool. Changes to the resource pool capacity are used to adjust the capacity for the specific date or selected period of time.
It is possible to lower the capacity even if it means that you don't have enough resources to serve all booked appointments on time. If this is the case, you will get a warning when saving the changes. You should then consider canceling or rescheduling the appointments that exceed the capacity.
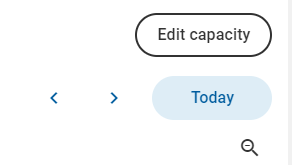
Open the virtual staff pool you want to change the capacity for and select a day or week. Click Edit capacity in the top right corner.
Click Edit to open the Edit capacity view.
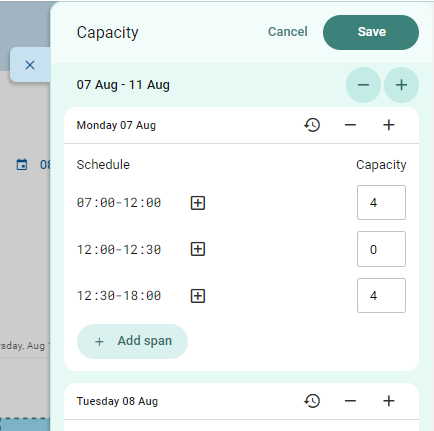
To increase or decrease the capacity of any of the existing time spans, use the up and down arrows or type in the new capacity.
To increase or decrease the capacity for the whole day, use the plus and minus buttons next to the date.
To increase or decrease the capacity for the whole time period, e.g., the whole week, use the plus and minus buttons next to the time period.
To copy a time span and edit it, click on the plus icon
 . When done, click Confirm
  .
.To add a new time span, click Add span. Set a start time, an end time and the wanted capacity, and click Confirm
.To restore the capacity to the default schedule, click Revert to baseline
 .
.
When you are done, save.
After you have changes the capacity, you can see the new capacity represented by the blue bars. The baseline capacity is represented by the dashed line.
Manage resource availability
To see the availability and utilization of specific resources, for example staff resources, select a branch and then select Staff on the Staff tab.
Note
You only have this option if you have pools with specific resources. If you only have virtual resource pools, you cannot manage the availability of specific resources.
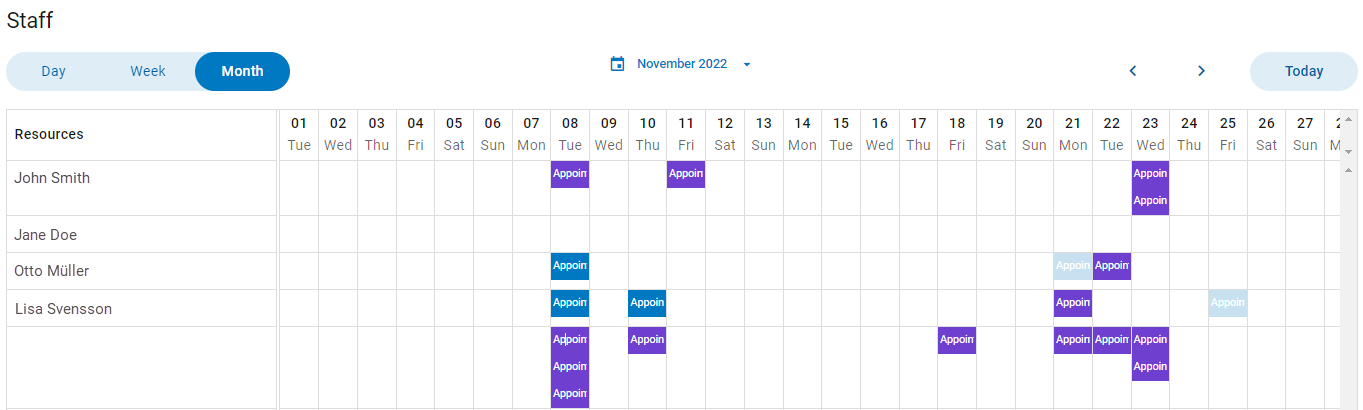
Resource availability overview
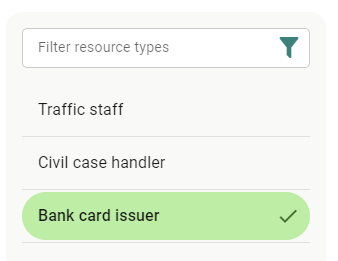
To see the availability of resources, select the resource type you want to see the availability for. If you want to see the availability of all resources, unselect any selected resource type in the list.
This calendar view shows an overview of when the resources are booked and when they are available.
To see a more detailed calendar view for a single resource, click on the resource name. Click on the date to change to for example week view. Here you can see:
Booked appointments for the resource, both chosen by customer and assigned by system
Time marked as unavailable
If Outlook sync is enabled, you can also see events marked as Busy or Out of Office in Outlook Calendar.
Change resource availability
You can make resources temporarily available or unavailable without changing their default schedule. It is a one-time change that is only applied on the selected time period.
From the overview of the resources' calendar, click on the resource for which you want to change the availability.
Click Availability in the top right corner.
Mark a timeslot in the calendar.
Select if the resource should be available or unavailable during the selected timeslot.

If needed, adjust the start and end time.
Click Create.
Note that you cannot make a resource unavailable during hours when they have booked appointments.
To delete a change of a resource's availability, click on it and select Delete.
About Outlook integration
If your organization uses the integration with Outlook Calendar, appointments are synced to staff resources' Outlook calendar. This means that appointments will appear in the staff members' Outlook calendar with appointment information such as service, customer, service questions. There is also a link to the appointment so that the appointment can be edited (rescheduled or deleted).
Note
Changes to appointments must be done from Qmatic Experience Cloud. If an appointment is deleted or rescheduled in Outlook, the changes will not be reflected in Qmatic Experience Cloud.
If the two-way sync with Outlook Calendar is turned on, events marked as Busy or Out of Office in Outlook Calendar are sent to Qmatic Experience Cloud and shown in the calendar view for the staff member. The timeslots will be blocked for bookings.
Close services and cancel appointments
You can close services and cancel appointments during a set time period in case something unexpected happens. If you do, the system will cancel the appointments in the list and send notifications to the affected customers. The selected services will be closed for bookings for the selected time period.
To close services and mass-cancel appointments:
In the Services tab, click Actions in the top right corner, and then click Close service(s) and cancel appointments.
Review the list of appointments that you are canceling. You can still click on services on the left-hand side to edit the service selection.
Click Next to proceed.
Review the services to close again. In this step, you can edit the time period and services to close. You can also enter the reason for the cancellation, which will show in the service pages. This information is only internal.

Click Go to notifications to proceed. If you want to exit the mass cancellation flow, click Close in the top left corner.
Enter a message to your customers, which will be added to the standard cancel notification.
Click Go to summary.
Look through the summary to make sure that all settings are correct. If you want to make any changes, click Back. If you want to exit the mass cancellation flow, click Close in the top left corner.
To proceed, click Execute closing and send cancellations and wait for the system to cancel the appointments.
When the service or services are closed and the appointments canceled, click OK.
Note
If all appointments were not closed for some reason, you will be notified. Click Show remaining appointments to view the remaining appointments and try closing them again.
Note
Appointments with multiple services will be canceled if just one of the services in the appointment are closed.
Reopen service for appointments
If a service has been closed for a day, you can reopen the service for appointments from the day view.
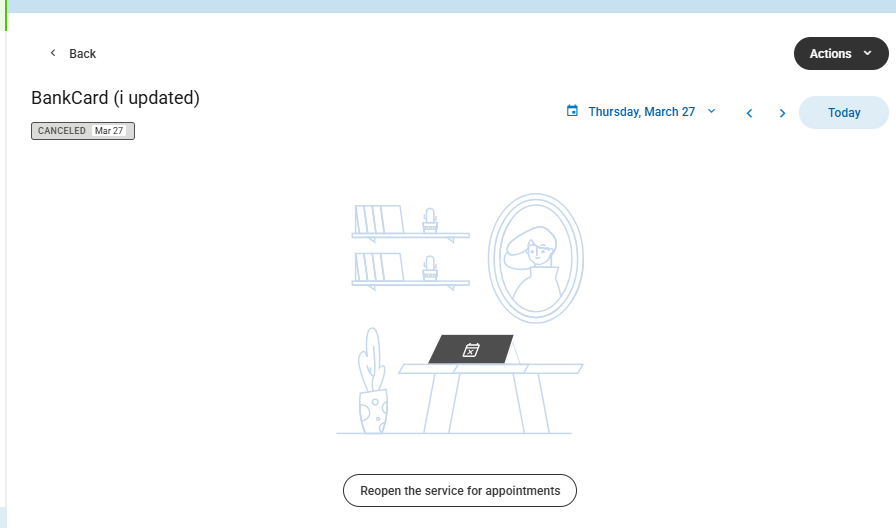
In the Plan view, go to Services and click on the service name.
Click Reopen the service for appointments.
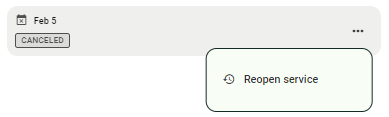
In the slide-out on the right-hand side, click on the three dots and then click Reopen service.
In the pop-up, click Yes, reopen.
Note
If a day is closed, that day can be opened for appointments by administrators in the closed days configuration.
Export appointment list
You can export the appointments for your service, date, and branch selection to a .csv file. The file contains the following information:
First name
Last name
Email
Phone number
Service
Branch
Date
Appointment time
Notes
Status
To export the appointment list:
Go to the Services tab and filter out the appointments you want the exported list to include. You can filter on service, time range, and active/canceled appointments.
Select Actions > Export appointments.
A .csv file will be downloaded. Depending on the size of the appointment list, it may take a few seconds before the download starts.
Appointment details (Plan view)
In the Plan view, you have the option to manage appointments just like in the Book view.
In the list of appointments on the Services tab, click on an appointment to see the appointment details.
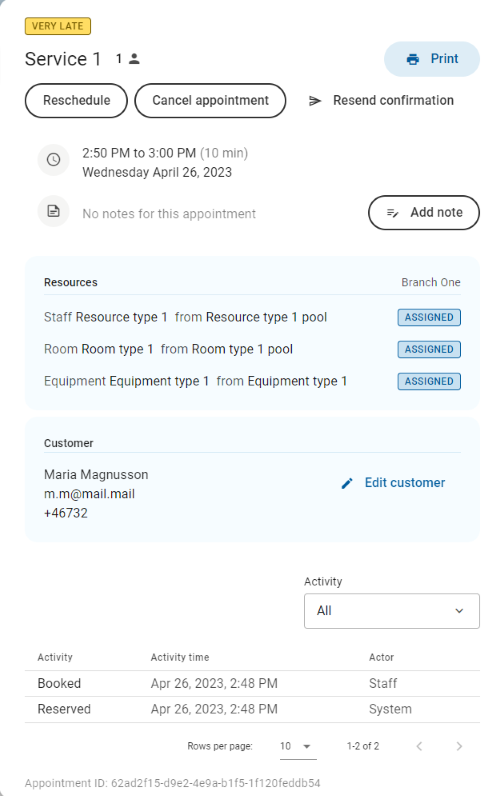
Available actions
From the appointment details, you can:
reschedule or cancel the appointment
resend the appointment confirmation notification
print the appointment confirmation
add a note
edit the customer information
Appointment information
You can also see the following information:
Appointment status
Service
Number of customers attending the appointment
Time until the appointment
Date and time
Notes (if any)
Branch
Resources and whether they were chosen by the customer or assigned by the system
Customer information
Answers to screening and information questions (if any)
Activity log with the previous appointment statuses and edits, such as if a note has been added or the appointment has been rescheduled. You can also see if the activity was performed by the system or by a staff member.
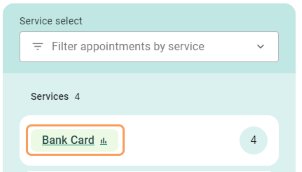
Manage service capacity
To see the capacity for a service, go to the Services tab and click on the service name or the bar chart icon next to the service name.
Day and week view
When you first open the service capacity view, you will by default see the day view. To see the week view, go to the date picker and select Week. The day view and week view show the actual number of booked appointments for the selected service:
The red bar shows the number of booked appointments.
The green bar shows how many parallel appointments can be booked for this service, based on the limit set in the appointment configuration.
The blue bar shows the resource capacity based on the availability of resources.
A pink bar means the day is configured as closed.
A gray bar means that all appointments for the selected service have been canceled on that day.
Since some services share the same resources, the remaining capacity can be reduced even though there are no appointments booked for the service you are looking at.
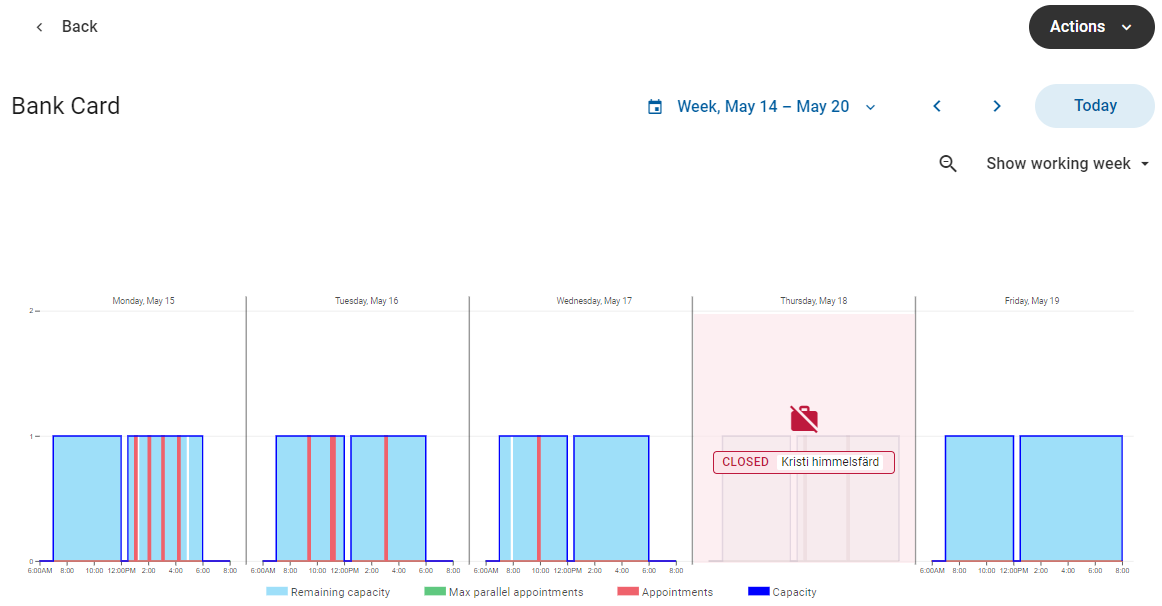
Use the left and right arrows to toggle between dates, or use the date picker to select another date.
To toggle between showing the full day and showing only working hours (06:00–20:00), click Zoom in/Zoom out.
For the week view, you can also toggle between showing only workdays (Monday–Friday), and showing the full week.
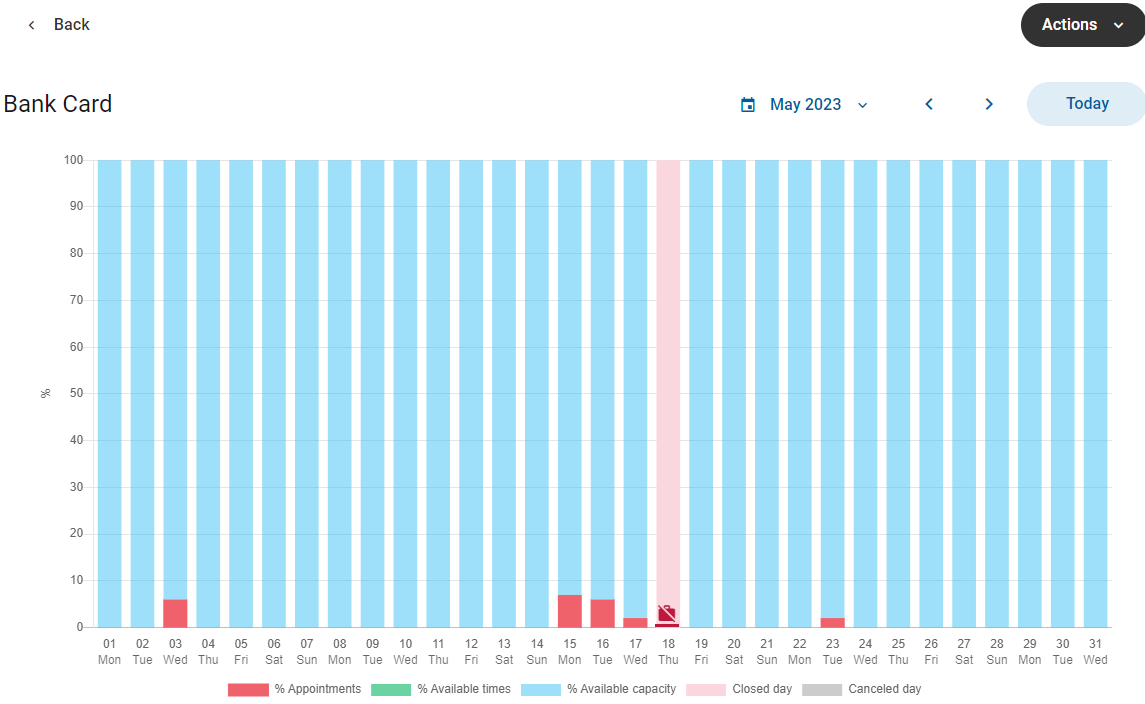
Month view
To see the month view, go to the date picker and select Month. The month view shows the availability as a percentage of the resource capacity where one bar represents one day:
The red bar shows the percentage of the resource capacity that is booked.
The green bar shows the percentage of the resource capacity that is available to book, based on the limit set in the appointment configuration.
The blue bar shows the total available capacity and is always 100%.
A pink bar means the day is configured as closed.
A gray bar means that all appointments for the selected service have been canceled on that day.
Edit service limit
Editing the service limit means that you set a temporary limit for how many appointments can be booked at the same time for a service (max parallel appointments). You can use this to open or block slots temporarily without changing the default configuration. It is a one-time deviation from the normal limit and is only applied on the selected date. You can add more than one deviation for the same day.
The service limit can only be edited from the day view.
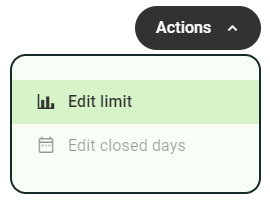
From the day view, select Actions > Edit limit in the top right corner.
Click on the plus sign.
Enter the hours during which you want the edited service limit to be applied.
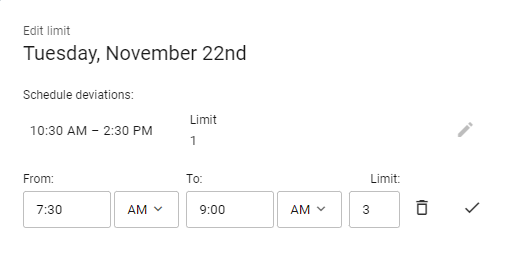
Set the new limit.
Click Check
to save the deviation.Add any other deviations for the day.
Click Confirm when done.
To delete a deviation, click Delete  .
.