User guide: Book view
You can assist customers by booking appointments for them in the staff booking view.
In the staff booking view, you can:
Book appointments
Cancel appointments
Reschedule appointments
Edit appointment details
Edit customer information
See all booked appointments for a customer
Print appointment details
To open the booking application, go to Book in the menu.
Workspace overview
Here is a quick overview of the workspace:
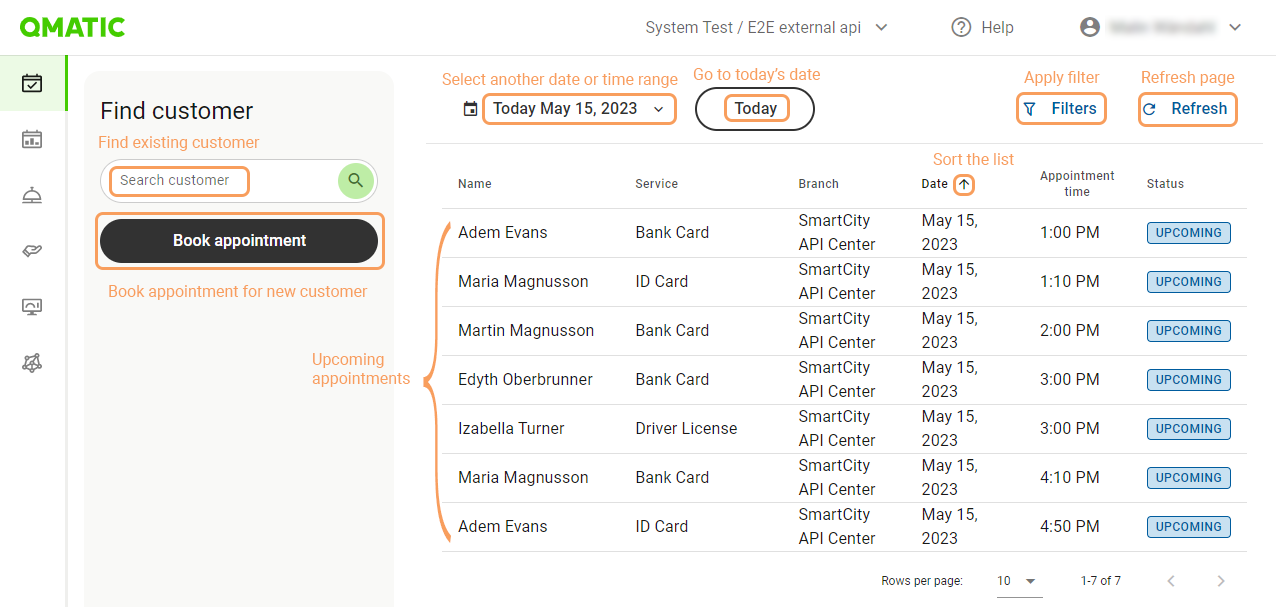
Search customer – Start typing to book an appointment for an existing customer or find all appointment for a specific customer.
Book appointment – Click here to book an appointment for a new customer.
Date selection – Use the date picker to select another date or time range for the list of appointments.
Today – Use this button to go to today's date.
Filters – Filter the list of appointments by service and branch.
Refresh – Click Refresh to refresh the list of appointments.
Appointments – A list of appointments for the selected time range. By default it shows all appointments for today's date, including those where the appointment time has passed.
Click an appointment to view the appointment details:
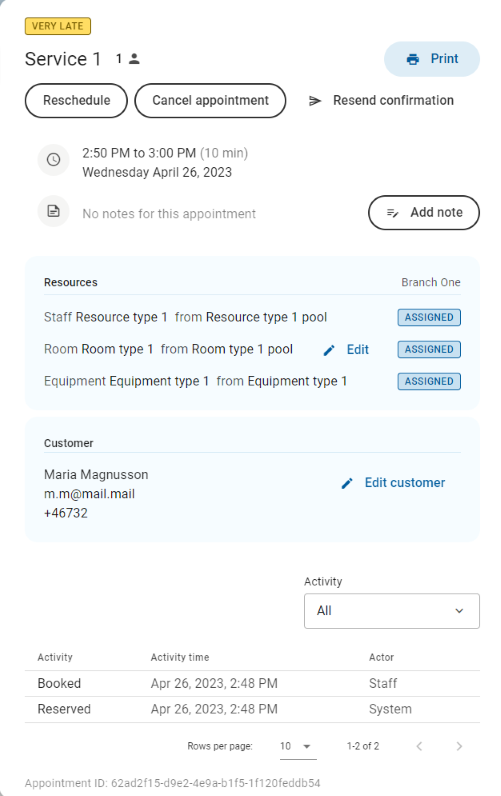
Here, you can:
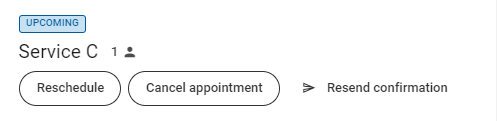
reschedule or cancel the appointment
resend the appointment confirmation notification
print the appointment confirmation
add a note
edit the customer information.
You can also see the following information:
Appointment status
Service
Number of customers attending the appointment
Time until the appointment
Date and time
Notes (if any)
Branch
Resources and whether they were chosen by customer or assigned by system. Some room resources can also be edited.
Customer information
Answers to screening and information questions (if any)
Activity log with the previous appointment statuses and edits, such as if a note has been added or the appointment has been rescheduled. You can also see if the activity was performed by the system or by a staff member.
Booking appointments
Note
You can do the steps in the booking process in any order.
To book an appointment:
Click Book appointment.
Choose if you want to book an appointment for a new customer or for an existing customer.
To book an appointment for a new customer: Click New customer and fill in the customer information:
First name
Last name
Email
Date of birth
Phone number
Country code - used for the phone number
Preferred language - notifications are sent to customers in this language
To book an appointment for an existing customer: Start by searching for name, email, phone number or birth date in the Search customer field. Click on the customer in the list.
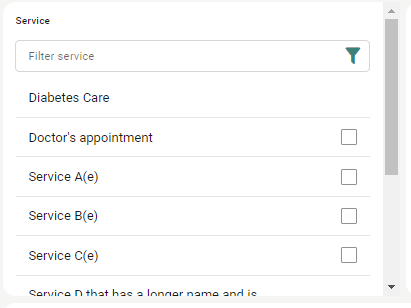
Select a service. If there are many services, use the search field to find it quicker. If you want to book more than one service, you need to first select a branch. If a service can be combined with other services, you will see a checkbox next to the service name.
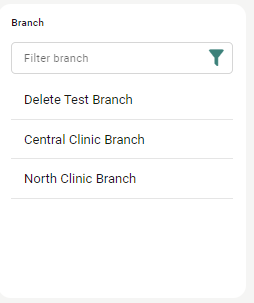
Select a branch. If you have selected a service, you will only see the branches that offer the selected service.
(Optional – depends on configuration): Select a staff resource. It may be possible to select Any. In this case, a resource will be assigned by the system.
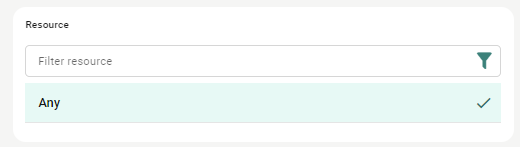
(Optional – depends on configuration): Select a room resource. If a specific room is required for the appointment, choose it from the list. If the service allows it, you can also select Any, and the system will automatically assign an available room.
Note
To show or hide the room selection card:
Click the Personal settings icon (
 ) at the top of the booking view.
Toggle Show room selection on or off.
Select date and time. If you want to book an appointment during a specific part of the day, use the filters Morning, Midday and Afternoon. If you want the first available timeslot to be selected automatically, check the First available check box.
Check out the summary to the right. Here, you can:
select the number of customers per service
answer any screening questions or information questions
write notes for the appointment.
When you are done, click Confirm booking.
Once the appointment is booked, an appointment confirmation with information about the appointment and the customer is shown.
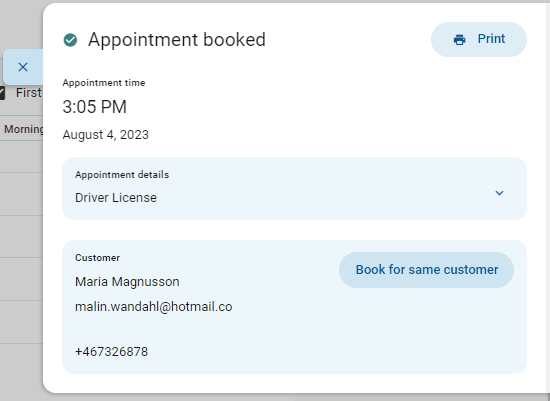
To print the appointment confirmation, click Print.
To book another appointment for the same customer, click Book for same customer.
Rescheduling appointments
It's possible to change the date and time of an appointment.
To reschedule an appointment:
Start by finding the appointment by searching for the customer or by going to the date when the appointment will take place. Open the appointment details.
Click Reschedule.
Select a new date and time for the appointment.
Click Reschedule appointment to confirm.
When you reschedule an appointment, a new booking confirmation is sent to the customer.
Canceling appointments
When you cancel an appointment, the appointment is deleted from Qmatic Experience Cloud and from the staff member's Outlook 365 calendar, if that sync is turned on.
It is possible to write a cancellation message specific for this appointment. The custom cancellation message is usually added to the standard cancel notification.
To cancel an appointment:
Start by finding the appointment by searching for the customer or by going to the date when the appointment will take place. Open the appointment details.
Click Cancel appointment.
Write a cancellation message.
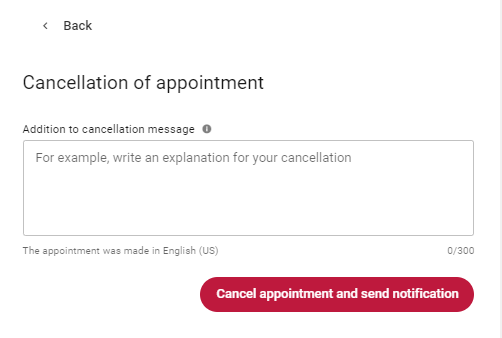
Click Cancel appointment and send notification.
Note
It is also possible to close a whole branch or service and mass-cancel appointments. This is done in the Plan view.
Updating customer information
It's possible to update the customer information, for example if the wrong phone number was entered.
Start by searching for the customer.
Click on the customer's appointment.
Scroll down to the Customer section.
Click Edit customer.
Update any fields that need to be adjusted.
Click Confirm.
Appointment statuses
Appointments can have different statuses depending on what has happened to it in the system.
Status | Description |
|---|---|
Upcoming | A customer or staff member has booked the appointment and the appointment time is not passed yet. The following actions are available for the appointment:
|
Waiting | The customer has arrived (checked in) for the appointment and is waiting to be called. |
Ongoing | The service is being delivered. |
Completed | The service has been delivered and the appointment is ended. |
Late | The customer is late for the appointment. The start time of the appointment has passed.The following actions are available for staff only (not for customer):
|
Very late | The customer is very late for the appointment and the end time of the appointment has passed. |
Never arrived | The appointment time is passed with more than 24 hours. It is no longer possible to check in. |
No show | The customer checked in for the appointment, but never arrived when called. |
Canceled | A customer or staff member has canceled the appointment NoteCanceled appointments are only visible when looking at appointments booked for a specific customer. |
Removed | The customer checked in for the appointment, but removed themselves from the queue. |