Configure the online booking
The online booking is the publicly available site where customers can book appointments online.
To configure the settings for the online booking, go to Appointments > General > Online booking.
Note
To configure which services are available in the online booking and turn on phone number verification, you need to configure service booking rules.
Set up service groups (online booking)
To improve the overview of services in the online booking, you can arrange related services into groups, and also change the order of services. This is helpful in organizations that offer many services. Services can only be arranged on general level.
When you configure service groups, keep in mind that all services are shown in the Service Arrangement tab, regardless if they are set as enabled in the online booking in the service settings or not.
To create a service group:
In Appointments > General > Online booking > Service arrangement, click Edit.
Click + New group.
Give the group a name. The name will be visible in the online booking so you may need to translate it to other languages. Click Add to add the group.
Select the services that you wish to add to the group, and click Move to group.
In the pop-up, select a group from the list and click Move.
To remove a service from a group, select the service and move it to No group.
Note
Each service can only be in one group.
You can also arrange the service list in any order you want. Select a service or a group and click Move up or Move down.
When you are done with your changes, click Confirm.
Show or hide service duration
In the online booking, the service duration is shown by default in the list of services, in the appointment summary and in the appointment confirmation.
To change this setting, go to Appointments > General > Online booking > Display options and enable or disable Show approximate service duration.
Configure privacy policy (online booking)
To be allowed to collect customer data, there must be a privacy policy stating how the data is handled. In the online booking, the privacy policy can be opened below the fields for entering personal information.
You can not use html tags in the privacy policy, only plain text is allowed. There is no maximum number of characters.
To configure a privacy policy:
Go to Appointment Configuration > General > Online booking > Privacy policy.
Click Edit privacy policy.
Enter the policy text.
Click Confirm.
Optionally, add the privacy policy in other languages.
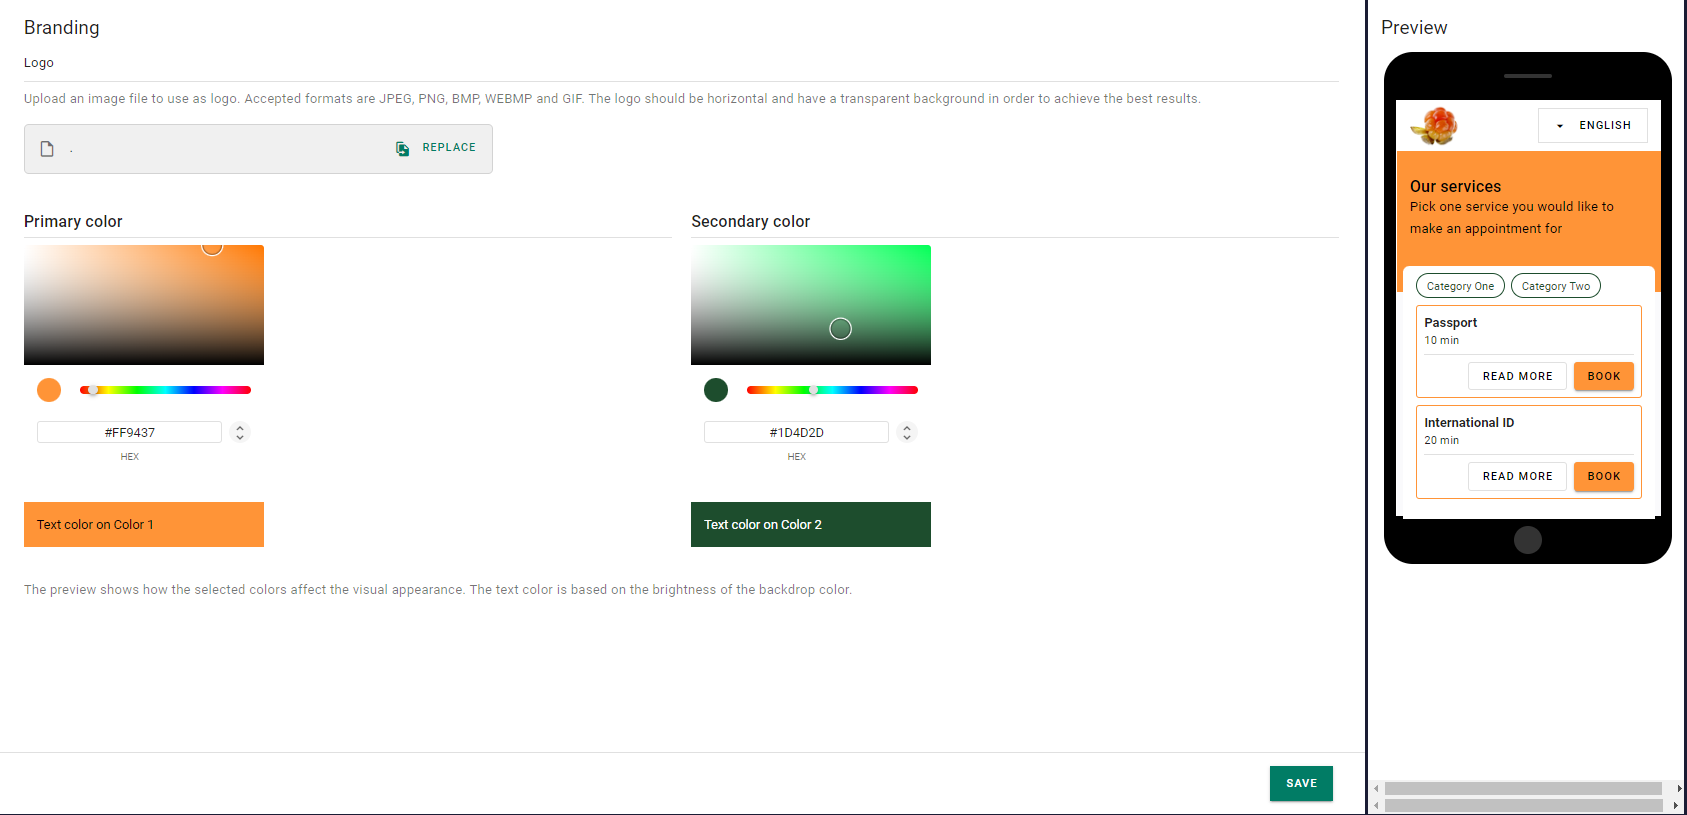
Customize logo and colors
To customize the appearance of the online booking page, go to Branding in the Configuration panel.

Upload logo
You can upload a logo that represents your brand and is shown in the top of the online booking page. For best results, use a horizontal logo with a transparent background.
Accepted file formats:
JPEG
PNG
BMP
WEBMP
GIF.
To upload a logo, click Upload logo or Replace, and select a file from folder.
Customize colors
When it comes to branding, you can select two colors: one primary color and one secondary color. The primary color is used for most buttons, on the progress tracker, on field label text etc. The secondary color is used on "chips".
To change the colors, use the color picker or enter a color code. Click the up and down arrows to choose between the color scales HEX, RGB or HSL.
When you are done with the settings, click Save.
Online booking URLs
Go to General > Appointments > Online booking to find a link to the online booking site.
Go to General > Service settings > Booking shortcut to find the link for each service, where the service is preselected. If you go to the same tab on branch level, you find a link where both the service and the branch is preselected.
There is also a possibility to preselect service, branch, and number of customers. The URL should look like this:
https://<domain>/booking/singlebooking/serviceselection?selectedService=<ServiceID>&selectedBranch=<BranchID>&nrOfCustomers=<number>
For example:
https://demo.qmatic.io/booking/singlebooking/serviceselection?selectedService=98450a1a-6ac5-4032-b99b-0c02efb9db20&selectedBranch=092b26fd-72f4-4fbf-a5a9-aa83184cde67&nrOfCustomers=2