Managing notifications
Notifications are configured and managed in different parts of the system, depending on their type. The table below provides an overview of each notification type, its purpose, where it is configured, and how it is triggered.
Notification type | Purpose | Target | Configuration location | Trigger | Role requirement |
|---|---|---|---|---|---|
Appointment notifications | Booking and reminder messages | Customers with booked appointments, that have not yet checked in / arrived. | Configuration > Appointments > General > Appointment notifications | Automatic | Appointment manager or System administrator |
Visit notifications | Real-time updates during visits | Customers that have checked in / arrived at branch(es). | Configuration > Business Configuration > Notification Admin | Automatic / Manual | Visit Manager Administrator |
Instant SMS notifications | Emergency/urgent messages | Customers that have checked in / arrived at branch(es). | Notify customer (option directly available in menu) | Manual | Notifications manager |
Staff alerts | SLA, arrival, and appointment notifications | Internal staff | Configuration > Business Configuration > Notification Admin | Automatic | Visit Manager Administrator |
The following notes apply to how changes are applied for different notification types:
Appointment notifications: Changes are deployed when saved. No need to publish the configuration.
Visit notifications: Changes are deployed when saved. No need to publish the configuration.
Instant SMS notifications: Sent manually via the Notify customer view. No separate configuration is needed.
Staff alerts: Changes are deployed when saved. No need to publish the configuration.
Change content in messages
You may want to include more information in your messages, or change them in some other way.
Edit appointment notifications
In the Configuration panel, go to Appointments > General > Appointment notifications.
Click Edit notification.
Find the notification type you want to edit.
Change the message to your liking. You can use any of the content variables found next to the text fields.
When you are done and want to test the changes, send a notification preview.
If you have other languages, edit the message in the other languages by opening the tabs for each language.
To save, click Confirm. Changes are implemented immediately.
Edit visit notifications
In the Configuration panel, go to Business Configuration > Notification Admin.
Select the visit notification type you want to edit.
Go to the Messages tab.
If you want to edit the general message, make sure All is selected in the service drop-down. If you want to edit the message of a specific service, select that service from the drop-down.
Click Edit for the language you want to edit the message for.
Change the message to your liking. You can use content variables in the message.
Click Save. Changes are implemented immediately.
If you have other languages, edit the message in the other languages as well.
Edit staff alerts
In the Configuration panel, go to Business Configuration > Notification Admin.
Select the staff alert type you want to edit.
Select a branch.
Find the alert you want to edit and click Edit.
If you want to change the behavior of the alert, change any of the settings for the alert.
If you want to change the content of the alert, edit the message to your liking. You can use content variables in the message.
Click Save. Changes are implemented immediately.
Preview appointment notifications
For appointment notifications, you can send a preview of your notifications to see what they will look like.
Go to Appointment Notifications and click Edit notification.
Select the language you want to preview the notifications for.
Scroll down to Email notification preview or SMS notification preview.
Fill in your email address or phone number and click Send preview.


Notifications will be sent for all appointment notification types for the language.
Send emails with QR code for appointment check-in
When a customer has booked an appointment, you can send them an email with a QR code that can be used to check in for the appointment. The QR code can be sent either in the appointment confirmation or the booking reminder, or both, depending on the needs of your business.
To use a check-in QR code in notifications, insert the variable {9} in the message.
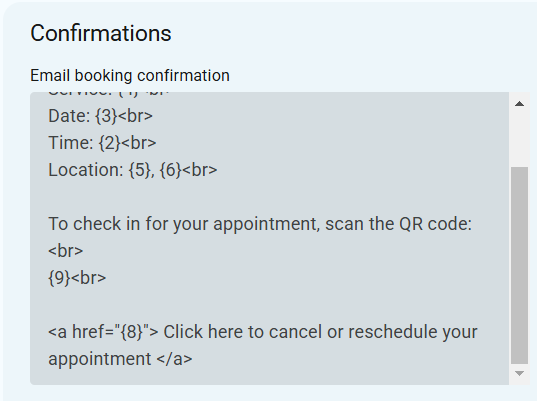
The email with the QR code will look something like this:
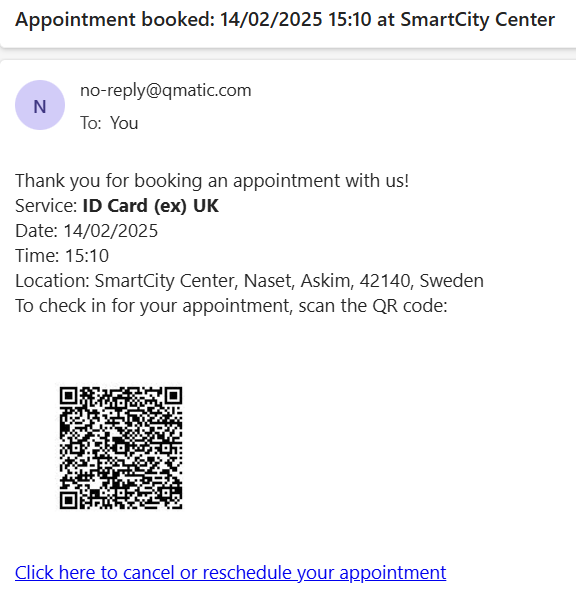
When the customer arrives to the facilities, they can scan the QR code at a check-in kiosk with a QR scanner, or it can be scanned by a staff member using the Check in view.
Send links in notifications
When a visit is ended, you can send out a link to give feedback online
In Notification Admin, open the Visit End notification and add a link to your customer feedback form. If you are using Qmatic's Customer Feedback solution, the link should have the following format:
https://cf.qmatic.cloud/xxxxxx-xxxx-xxxx-xxxxxxxxxxx/index.html?b={{branchId}}&v={{visitId}}
where xxxxxx-xxxx-xxxx-xxxxxxxxxxx is the unique token for your organization.
See Customer Feedback web app for more information about the Customer Feedback solution.
When a visit is created, you can send an SMS with a link to that particular visit in Mobile Ticket. This way, a customer can start their visit by selecting a service on a kiosk, but then follow their queue position online.
Note
To be able to send an SMS to a customer when a visit is created, the customer's phone number must be linked to the visit.
To include a link to view a particular visit in Mobile Ticket, insert the variable {{mobileFullURL}} in the message where you want the link.
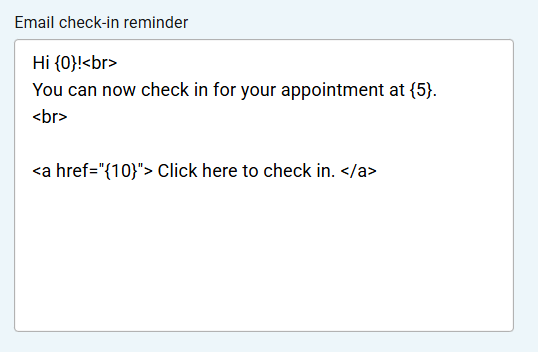
In the appointment notifications, you can send a link so the customers can check in themselves. The link goes to Mobile Ticket where the customer can see their ticket number after checking in. We recommend using the check-in reminder notification to send the link.
To include a link for appointment check-in, go to Appointment Notifications and insert the variable {10} in the SMS or email notification.
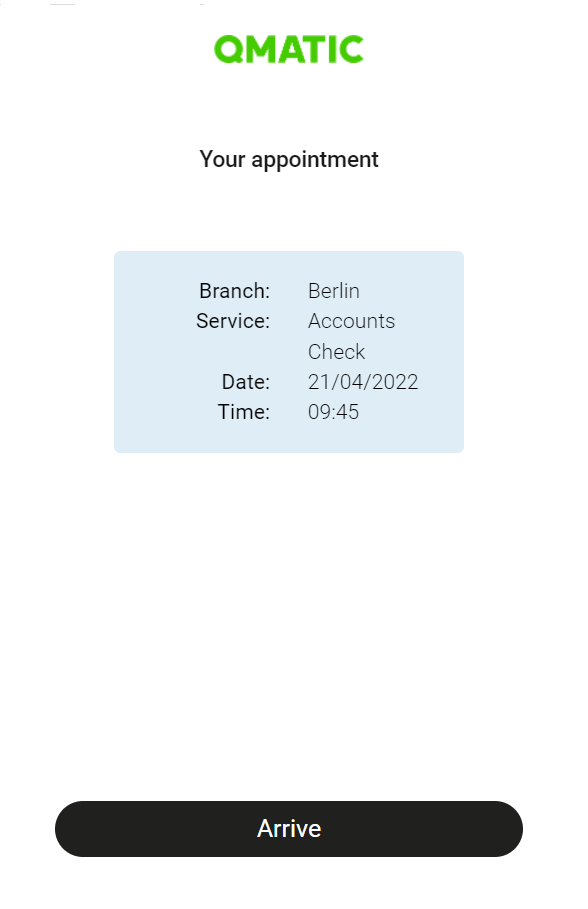
When customers click the link in the notification, they will be able to check in by selecting Arrive.
 |
Note
You can control how early and late the customer can check in from the Mobile Ticket configuration.
Notify staff that appointment customer has arrived
You can send a notification to staff when someone has arrived in a particular queue or for a particular service. You can choose to send the alert to a role, user or to the staff member that is the primary resource for the appointment.
Go to Business Configuration > Notification Admin and open the Staff Arrival alert.
Click Add to add a new alert.
Select if the alert should be based on queue or service. If based on queue, an alert is sent when a customer arrives in a certain queue. If based on service, an alert is sent when a customer select a certain service.
Select if an alert should be sent when the visit is an appointment, a walk-in visit, or both.
Select a receiver type.
Select a notification method: email or SMS. Make sure that your have the contact information available for the method you select. For example, if you select SMS, you must make sure that you have the phone number for all staff members that may receive the notification.
Note
Note that if you select primary resource as receiver type, only email is available as notification method.
Select if the alert should be sent only when the visit is created, only when transferred, or both when created and transferred.
Write a message for the alert. For example: "A customer has arrived in Passport Queue". You can use any of the available variables.
Check the Show text in RightToLeft checkbox if the message is written in a right-to-left language.
Save the notification.
Change when appointment reminders are sent
The time when the appointment reminder is sent is configurable.
To change when the appointment reminders are sent, go to Appointments > General > Appointment Notifications and click Edit notification. Set the hours and minutes for Booking reminder and Check-in reminder. This is how in advance the reminder notifications are sent.