Serve view settings
You can change what information and functionality is available on the visit card.
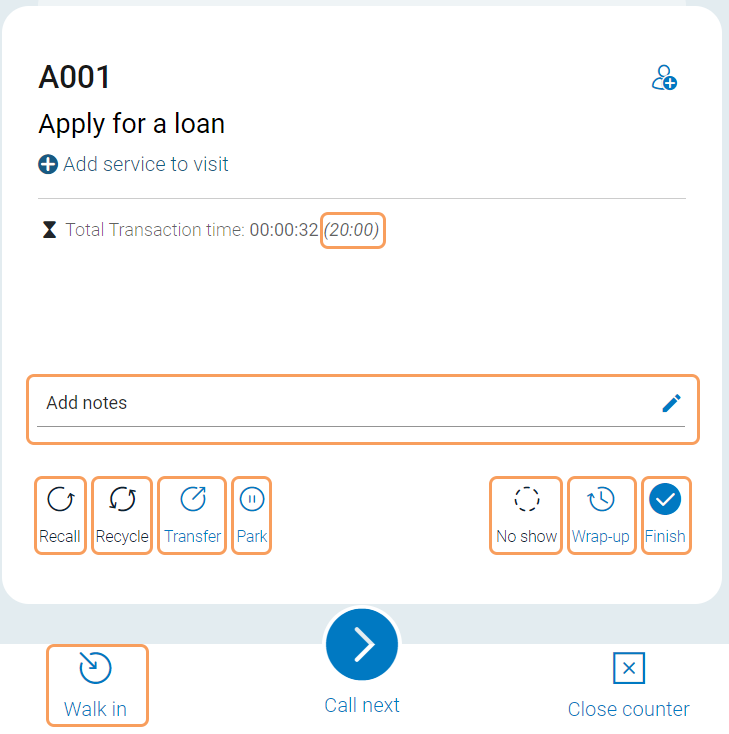 |
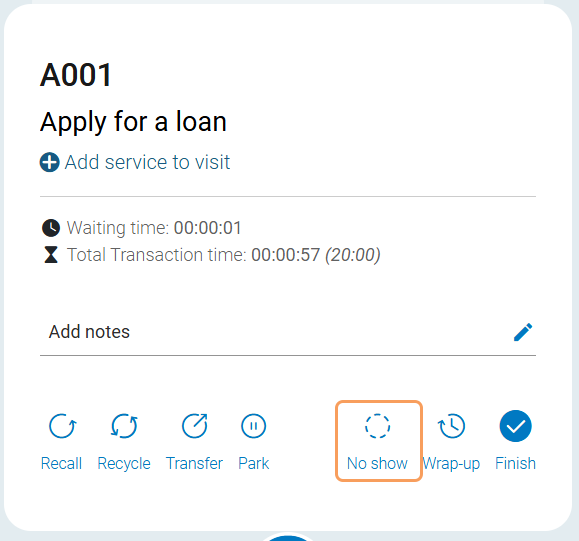
Recycle button: Show or hide the Recycle button. Recycling means that, if a customer does not respond to the initial call for service, or for any other reason you want the customer to be called again later you can put that visit back into the queue at the first position. Note that the customer cannot be called until a certain time has passed. The default delay time is 60 seconds, but it can be changed in system settings by a system administrator. It is only possible to recycle a visit a certain number of times (default three times).
Level: Equipment profile
Recall button: Show or hide the Recall button. If a customer does not respond to the initial call for service, and you want to call the customer directly again, you can call the customer again. When calling a customer again, the call is re-announced on the displays and through the audio units available in your system.
Level: Equipment profile
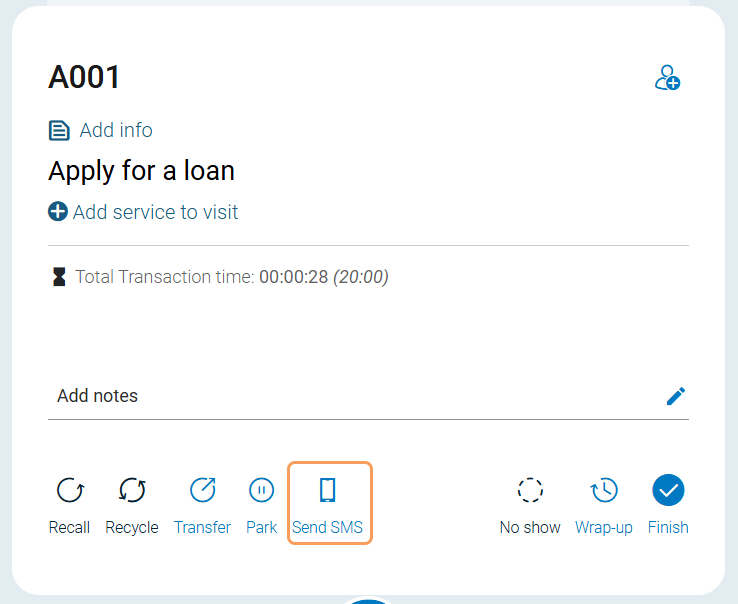
Wrap-up: Show or hide the Wrap-up button. By allowing staff to use the wrap-up feature, you can track the time staff spends actually serving the customer, and the time they spend doing for example paper work after the customer has left.
Level: Equipment profile
Walk-in button: Show or hide the Walk-in button. The walk-in button can be used when a customer walks straight to a counter without taking a ticket. You may then want staff to be able to register the visit for statistical purposes. If you don't want staff to be able to select a service when using the walk-in feature, you can also set a Default walk-in service.
Level: Equipment profile
Show expected transaction time: Show or hide the expected transaction time. The time is shown in parenthesis after the Total Transaction time. The expected transaction time is based on the Serving time defined in the service settings.
Level: Equipment profile
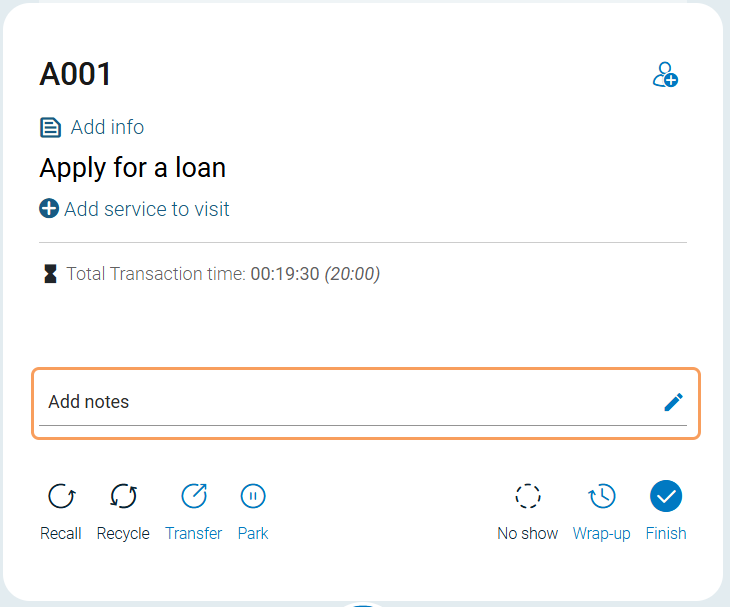
Notes button: Show or hide the Notes field.The notes field is where staff can see previous notes for the visit and also add or edit notes. The maximum number of characters for a note is 255. All notes are deleted when the visit is finished.
Level: Branch
Park button: Select if the Park button should be hidden, or if parked visits should be sent to either the user pool, or the counter pool.
Level: Branch
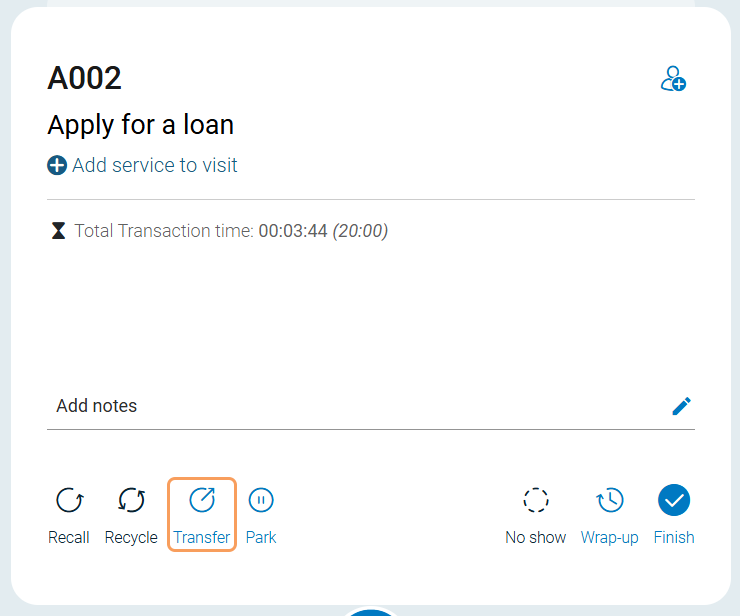
Finish button: Show or hide the Finish button. If you choose to hide the Finish button, Call next or Close counter have to be used to finish a visit.
Level: Branch
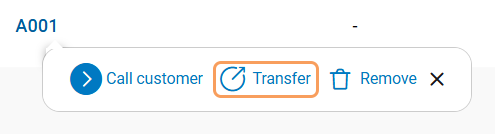
You can also configure the Transfer button , the No show button and the Notes field.
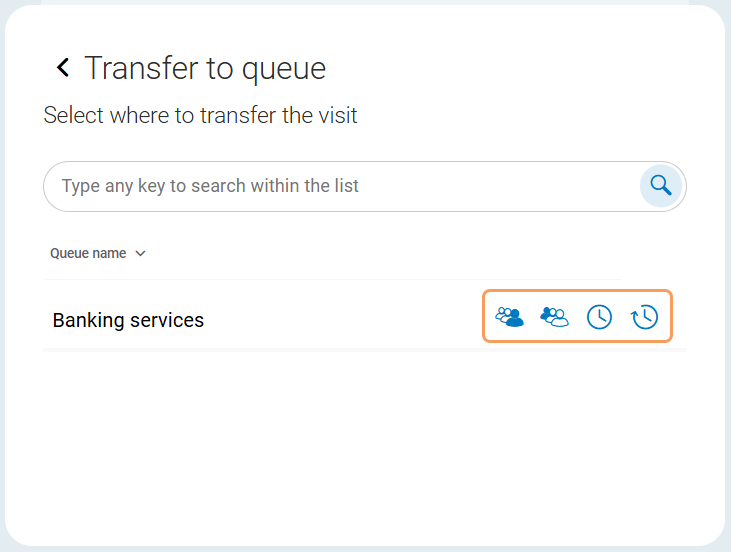
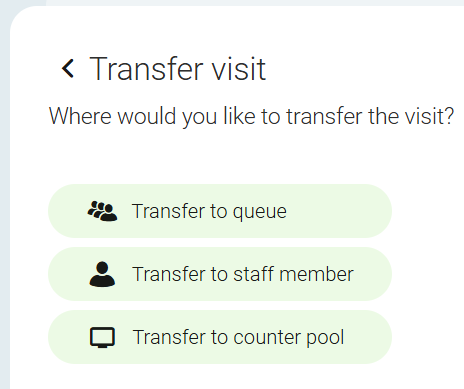
Transferring a visit means to move it to another queue, staff member or counter. If a visit is transferred to a staff member or a counter, the visit is placed in a pool. If a visit it transferred to a queue, it can be placed first, last, or based on waiting time. For more information about how transferred visits are sorted in queues, see Sorting logic.
There are several settings to control the transfer options in the WebServicePoint unit types.
Settings for how visits can be transferred
 |
Transfer first: Controls the option to place a visit first in line.
Level: Branch
Transfer last: Controls the option to place a visit last in line.
Level: Branch
Transfer sorted: Controls the option to transfer a visit based on waiting time.
Level: Branch
Transfer with delay: Controls the option to transfer a visit with delay. When a visit it transferred with delay, the visit will be visible in the queue or pool after a selected number of minutes. If a visit is transferred to a queue with delay, it will be sorted based on waiting time.
Level: Branch
Allow transfer to queue, counter pool and staff pool
 |
Allow counter pool transfer: Controls the transfer to counter pool functionality. Level: equipment profile. Note: The setting Counter pool transfer controls on branch level must be enabled for this option to be visible.
Counter pool transfer controls: Show or hide the Transfer to counter pool button. Level: branch. Note: the setting Allow counter pool transfer on equipment profile level must also be enabled.
Allow staff pool transfer: Controls the the transfer to staff pool functionality (also called user pool). Level: equipment profile. Note: The setting Staff pool transfer controls on branch level must be enabled for this option to be visible.
Staff pool transfer controls: Show or hide the Transfer to staff pool button. Level: branch. Note: the setting Allow counter pool transfer on equipment profile level must also be enabled.
Queue transfer controls: Show or hide the Transfer to queue button. Queue transfer functionality is included.
Level: Branch
Other transfer settings
Transfer button: Controls whether the transfer button on the visit card is available. Level: branch.
One click transfer option: Controls the option to transfer the currently served visit to another queue with just one click. Select if visits transferred with the "one-click button" should be placed first, last or based on waiting time ("sorted"). This feature requires that the setting Transfer button is enabled.
Level: Branch

Transfer from queue/pool: If enabled, it possible to find a particular visit in a queue or pool and transfer it.
Level: Branch
The following settings are related to walk time and arrival confirmation:
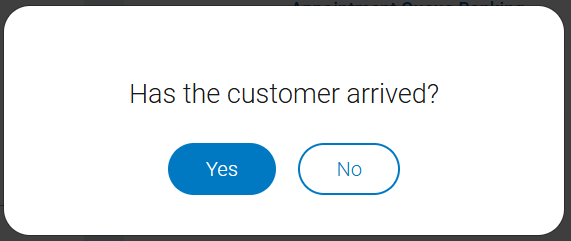
Confirm needed: When this setting is enabled, counter staff need to confirm the customer has arrived after he or she has been called.
Level: Equipment profile
Walk time Queue X and Walk time Queue X delay (secs): With these settings, you can control the minimum time that needs to pass from the visit is created until the customer can be called. This is useful if there is some walking distance between where the customer takes the ticket and where the service is provided. The walk time is set in seconds per queue and can be configured for up to 8 queues.
Level: Branch
During a visit, staff can add a phone number to a customer and send a text message. The content of the message is preconfigured in Notification Admin > Visit Update and is not something the staff member can change. A common use case is if a customer takes a paper ticket, but wants to follow their visit online. The message would then contain a link to the visit in Mobile Ticket.
The following setting can be enabled in the service point unit types:
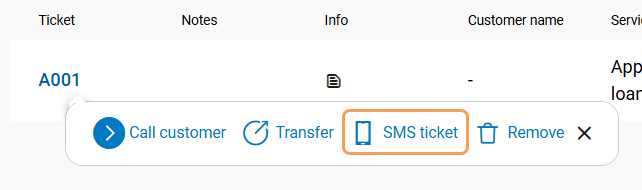
Send SMS: If enabled, the Send SMS button is available on the visit card and in the visit list when clicking on a visit.
Level: Equipment profile
On visit card:
In visit list:
Note
Texts can also be sent when a customer is called or when a visit is finished, but that is configured in Notification Admin and handled automatically.
You can control if it should be possible to mark a customer as a no-show and how the system should handle no-show customers.
No Show button: Enable or disable the No Show button on the visit card.
Level: Equipment profile
No-show queue: If you want no-show visits to be removed, leave this setting empty. If you want no-show visits to be transferred to a specific queue where they can be picked up later, select the queue they should be transferred to.
Level: Equipment profile
No-show queue transfer option: Defines where in the no-show queue visits should be placed (first, last or sorted). Only applicable if a no-show queue is selected.
Level: Equipment profile
You can allow staff to see and edit the notes for a visit. All notes are deleted when a visit is finished. The following settings related to notes exist:
Notes Button: Control the possibility to see and edit the notes for a visit. The user can only edit the notes for the visit they are currently serving.
Level: Branch
Notes full view: If enabled, notes are fully displayed in the visit list. If disabled, a notes icon is shown which the user needs to hover over to see the full note.
Level: Branch
For each visit, there can be information about the customer, such as name, phone number, date of birth etc. In most cases, this information comes from the time the customer took the ticket or booked the appointment, but it can also be added while serving the customer.
Note
What customer data is visible depends on the Customer data collection preferences.
If you configure customer information settings in the Unit Type Template (UTT), make sure they are consistent with the Personal Data Management (PDM) settings. The system will always give priority to PDM settings over UTT configurations.
For more information, see Personal Data Management.
General customer info settings
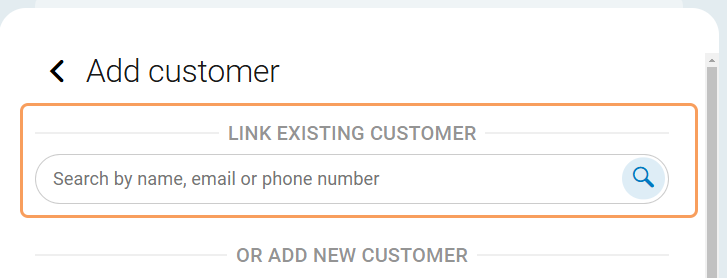
Customer information: Control the possibility to add customer info to ongoing visit.
Level: Branch

Hide customer details: Enable this setting to hide customer info in queue view. If hidden, customer ID is shown instead.
Level: Equipment profile

Hide customer search field: Enable this setting to hide customer search field.
Level: Equipment profile
Custom URL settings
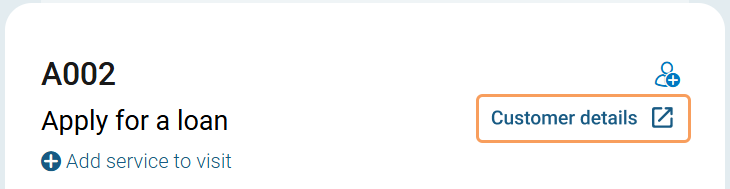
Custom URL: Defines whether a custom URL—based on a template containing visit- and user-specific parameters—is available on the visit information card. The custom URL enables integration with external systems (such as CRM or case management platforms), by passing relevant context-specific data in real time.
When configured, the URL can be opened automatically when a visit is called, and is also accessible via a button on the card. The default button label is Customer details.
Level: Equipment profile
Open URL automatically on call next: Determines whether the custom URL is opened automatically in a new browser tab when a visit is called.
Note
For the automatic redirect to work, you need to allow pop-ups and redirects for the Serve / Counter application in your browser settings. If pop-ups are blocked, the Custom URL will not open automatically, and no error message will be shown.
Level: Equipment profile
Custom URL syntax
The URL is created at runtime using placeholders enclosed in curly braces (e.g., {ticketId}, {custom2}, {servicePointName}). These placeholders are replaced with values from the user status object.
The base must be a valid URL.
You can include multiple query parameters, separated by
&.Use curly braces
{}to define placeholders that map to values in the User status object.Parameter names (e.g.,
ticket,id,agent) can be freely chosen, but the placeholder values (e.g.,{ticketId},{custom2},{servicePointName}) must match the keys in the visit or user status object exactly.If a placeholder cannot be resolved, its value will be empty.
Example
Given the following URL template:
https://example.com/profile?ticket={ticketId}&id={custom2}&agent={servicePointName}
Resolved data:
{
    "ticketId": "A017",
    "parameterMap": {
        "custom2": "value2"
    }
    "servicePointName": "WebServicePoint"
}
The final URL will be:
https://example.com/profile?ticket=A017&id=value2&agent=WebServicePoint
If custom2 is not present in the User status object:
https://example.com/profile?ticket=A017&id=&agent=WebServicePoint
{
  "id": "<visit_id>",
  "checksum": "<checksum>",
  "ticketId": "<ticket_id>",
  "unservedVisitServices": [],
  "currentVisitService": {
    "id": "<service_id>",
    "eventTime": "<event_time>",
    "serviceId": "<service_id>",
    "serviceInternalName": "<internal_name>",
    "serviceExternalName": "<external_name>",
    "visitDeliveredServices": [],
    "visitOutcome": null,
    "outcomeExists": false,
    "deliveredServiceExists": false,
    "primaryResource": null,
    "secondaryResources": null
  },
  "servedVisitServices": [],
  "visitMarks": [],
  "customerIds": [],
  "waitingTime": "<waiting_time>",
  "totalWaitingTime": "<total_waiting_time>",
  "timeSinceCalled": "<time_since_called>",
  "recycleAllowed": false,
  "noshowAllowed": false,
  "recallAllowed": false,
  "delayed": false,
  "delayExpirySeconds": 0,
  "parameterMap": {
    "firstQueueEnterTime": "<queue_enter_time>",
    "enterQueueTime": "<enter_queue_time>",
    "branchName": "<branch_name>",
    "lang": "<language>",
    "startQueueOrigId": "<queue_origin_id>"
  },
  "appointmentId": null,
  "appointmentTime": null,
  "branchCurrentTime": "<branch_current_time>",
  "timeSinceCurrentServiceCalled": "<time_since_service_called>"
}

{
  "branchId": 8,
  "userState": "SERVING",
  "visitState": "OK",
  "servicePointId": 6,
  "servicePointName": "WebServicePoint",
  "servicePointState": "OPEN",
  "visit": {
    "id": 105,
    "checksum": "1519165121",
    "ticketId": "A1113",
    "unservedVisitServices": [],
    "currentVisitService": {
      "id": 213,
      "eventTime": "22:37",
      "serviceId": 4,
      "serviceInternalName": "Service 1",
      "serviceExternalName": "Service 1",
      "visitDeliveredServices": [],
      "visitOutcome": null,
      "outcomeExists": false,
      "deliveredServiceExists": false,
      "primaryResource": null,
      "secondaryResources": null
    },
    "servedVisitServices": [],
    "visitMarks": [],
    "customerIds": [],
    "waitingTime": 0,
    "totalWaitingTime": 0,
    "timeSinceCalled": 7,
    "recycleAllowed": false,
    "noshowAllowed": false,
    "recallAllowed": false,
    "delayed": false,
    "delayExpirySeconds": 0,
    "parameterMap": {
      "firstQueueEnterTime": "2025-06-09T22:37:24.309+1200",
      "enterQueueTime": "2025-06-09T22:37:24.309+1200",
      "branchName": "Auckland",
      "lang": "gb",
      "startQueueOrigId": 10
    },
    "appointmentId": null,
    "appointmentTime": null,
    "branchCurrentTime": "22:37:32",
    "timeSinceCurrentServiceCalled": 7
  },
  "workProfileId": 1,
  "workProfileName": "All queues",
  "servicePointDeviceTypes": [
    "SW_SERVICE_POINT"
  ]
}
Custom parameters
Custom parameters: Controls which custom fields to show on the visit card and in queue view. Custom parameters can be any kind of additional information about the customer such as social security number, shoe size, or something else. You can only use custom2-custom5, as custom 1 is occupied to store notes.
Level: Equipment profile
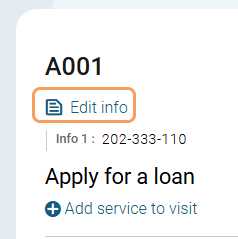
Edit custom parameters: Controls which custom fields should be editable in the visit card. Editable custom parameters are only considered if they also are enabled in the setting Custom parameters.
Level: Equipment profile
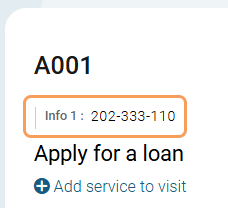
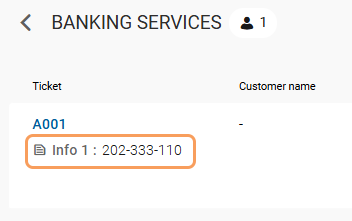
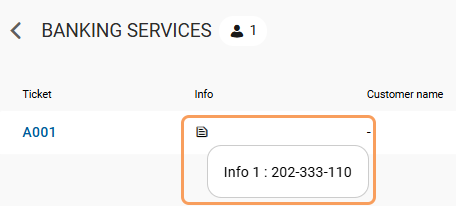
Custom field full view: If enabled, the information in custom fields is shown in the visit list. If disabled, you see an icon indicating that there is custom information for the visit which you can hover over to see the full information.
Level: Equipment profile
Enabled:
Disabled:
Phone number settings
Country code: Default country code in phone number field. Enter +XX (country calling code), or the two-letter country code according to ISO Alpha-2.
Level: Equipment profile
Preferred countries: Favorite countries to display in the top of the list of country calling codes. Enter a comma-separated list of two-letter country codes according to ISO 3166-1 Alpha-2.
Level: Equipment profile
You can control which parts of the Serve view interface are shown. The following settings exist:
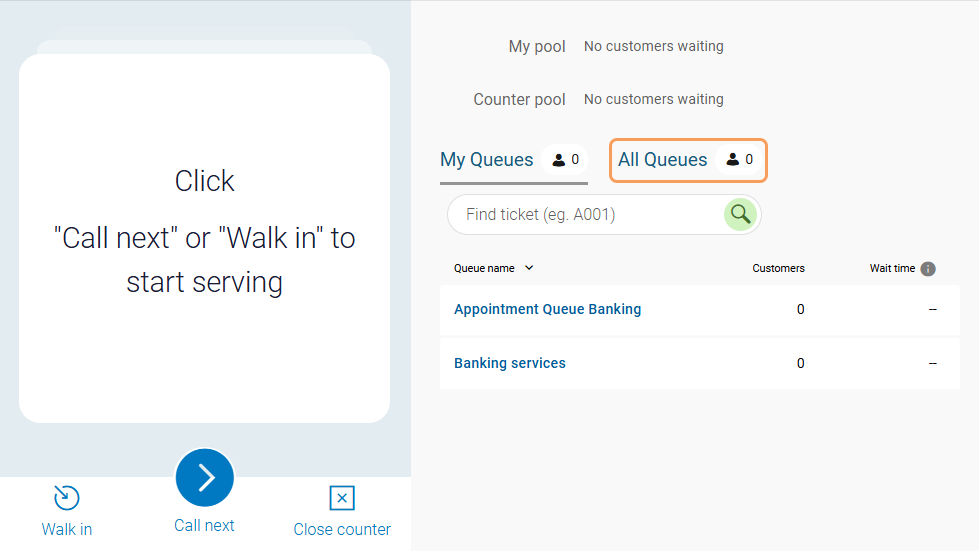
Counter pool view: Controls whether the counter pool section is shown.
Level: Branch
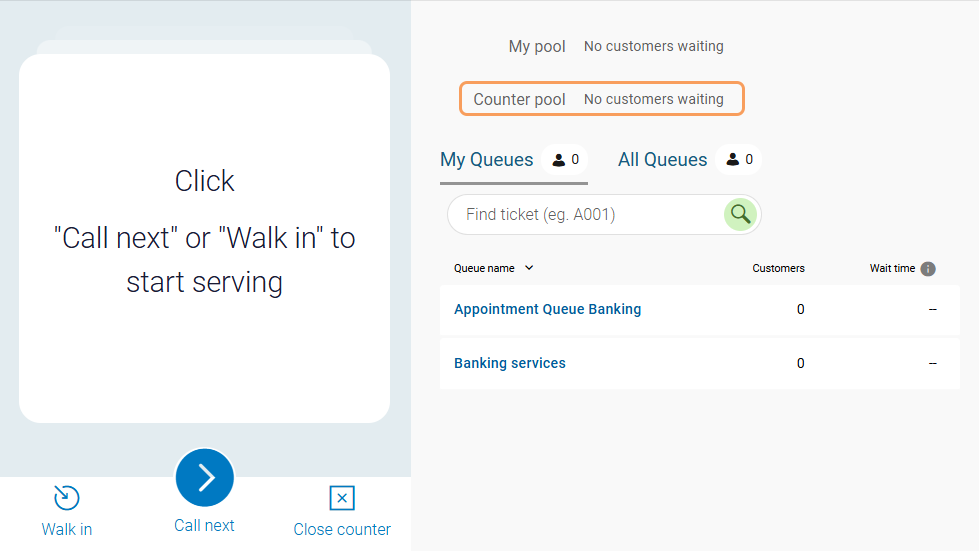
Staff pool view: Controls whether the staff pool section is shown.
Level: Branch
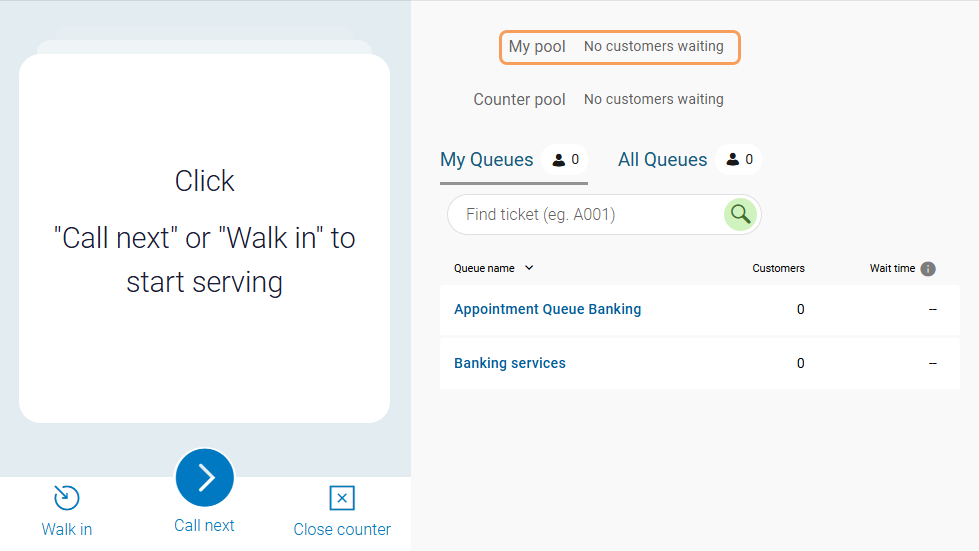
Queues view: Controls whether the queue view is shown.
Level: Branch
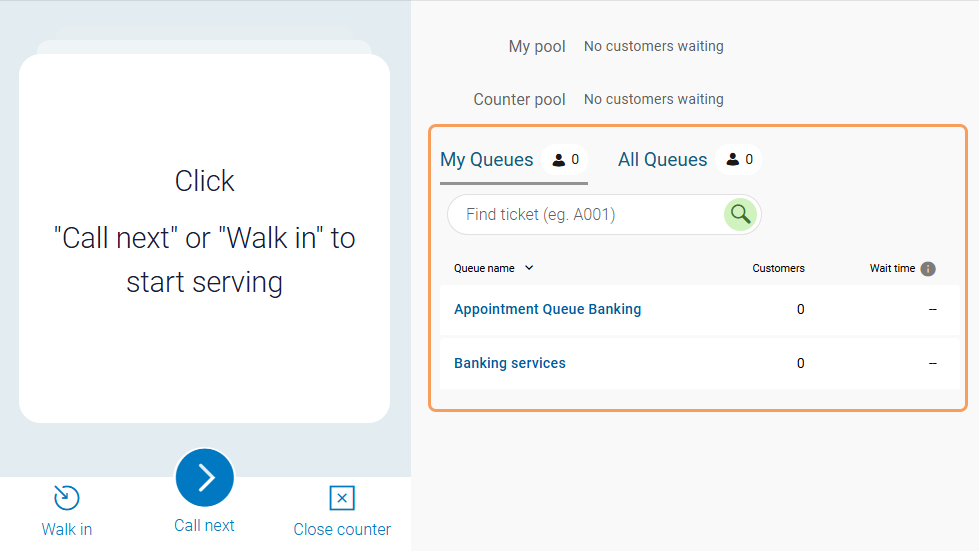
Show all queues: Controls whether staff can see queues that are not part of there work profile. This setting requires that the Queues view is enabled.
Level: Branch
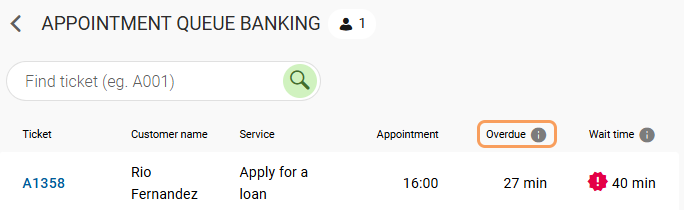
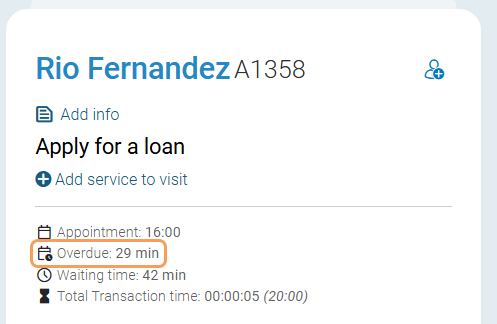
Normally, you can only see the waiting time for visits in a queue. For appointment visits, this is the time the customer checked in for their appointment. However, staff may also want to know how long time has passed since the booked appointment time. This value is called appointment overdue time, or appointment waiting time. The following setting can be configured:
Show appointment overdue time: If enabled, the time passed since the appointment start time is shown in the queue view, in the visit list and on the visit card.
Level: Equipment profile
In visit list:
In visit card:
All visits can have a language set to them. You can control if staff should be able to edit the language.
Visit language in visit card: Select if the language in the visit card should be disabled (not displayed), displayed, or displayed and editable.
Level: Branch
Visit language in visit list: Select if the language in the visit list should be disabled (not displayed), displayed, or displayed and editable.
Level: Branch
It is possible to allow users to find a specific visit in a queue and call (or remove) that particular customer.
Call from Queue: If enabled, users can call a particular customer from the queue.
Level: Branch
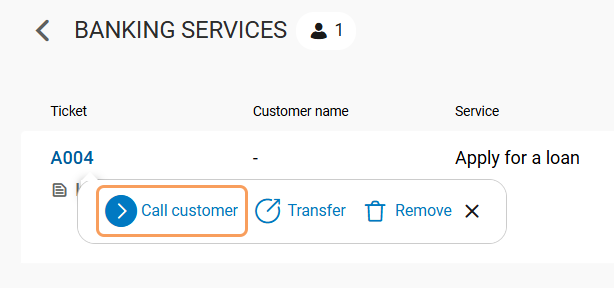
Remove from Queue: If enabled, users can remove a visit from the queue.
Level: Equipment profile
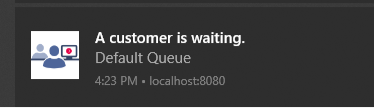
The following setting for desktop notifications exist:
Allow notification: If enabled, the user is notified with a desktop notification when a queue goes from 0 to 1 visits.
Level: Equipment profile
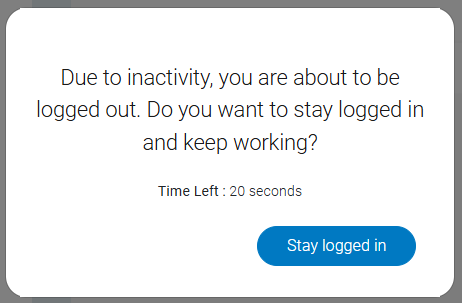
The following setting controls when a user is automatically logged out:
Auto close: Users are logged out after this time of inactivity (seconds). After the set time, the user is asked if they want to stay logged in. A timer start counting down, and if the user doesn't choose to stay logged in, they are logged out. Default value: 1800.
Level: Equipment profile
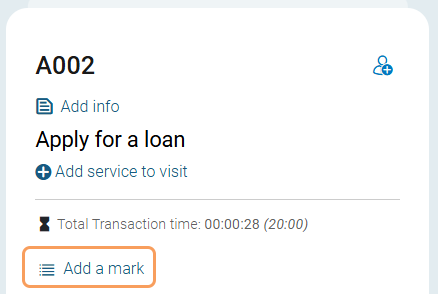
The following settings are related to marks:
Enable marks: Controls whether it's possible to add marks.
Level: Equipment profile
Marks type: Marks types to be used. There are three methods to select which mark types to use:
*: selects all mark types (except for NPS)
Marktype1, Marktype2: selects the entered mark types
Exclude: Marktype1, Marktype2: excludes the entered mark types
Note that it is not supported to use a combination of methods.
Level: Equipment profile
Mark mandatory level: Control whether it's mandatory to add marks. Select one of the following options:
None: Marks are not mandatory.
Visit level: Marks are mandatory per visit.
Transaction level: Marks are mandatory per visit transaction, i.e. before transferring a visit.
Level: Equipment profile
Multi marks: Controls whether it's possible to add x number of marks at once.
Level: Equipment profile
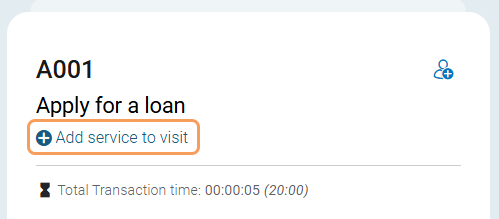
Multi Services: Controls whether it's possible to add more services to a visit.
Level: Equipment profile
Serve Multi Services: If enabled, the user can select which service to serve in a visit containing multiple services.
Level: Equipment profile