Check in view settings
You can find the settings to configure the Check in view in the unit type settings. Most settings are located on equipment profile level. If a setting is located on system level or branch level, that is mentioned specifically.
Transferring a visit means to move it to another queue, staff member or counter. If a visit is transferred to a staff member or a counter, the visit is placed in a pool. If a visit it transferred to a queue, it can be placed first, last, or based on waiting time ("sorted"). For more information about how transferred visits are sorted in queues, see Sorting logic.
Settings for how visits can be transferred

Transfer Sorted: Controls the option to transfer a visit based on waiting time.
Level: equipment profile
Transfer First: Controls the option to place a visit first in line.
Level: equipment profile
Transfer Last: Controls the option to transfer a visit based on waiting time.
Level: equipment profile
Allow transfer to queue, counter pool and staff pool
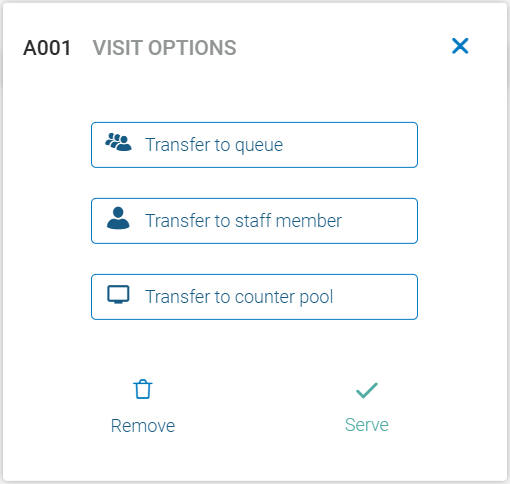
Staff Member Transfer: Controls the option to transfer to staff pool (also called user pool).
Level: equipment profile
Counter Pool Transfer: Controls the option to transfer to counter pool.
Level: equipment profile
Queue Transfer: Controls the option to transfer to another queue.
Level: equipment profile
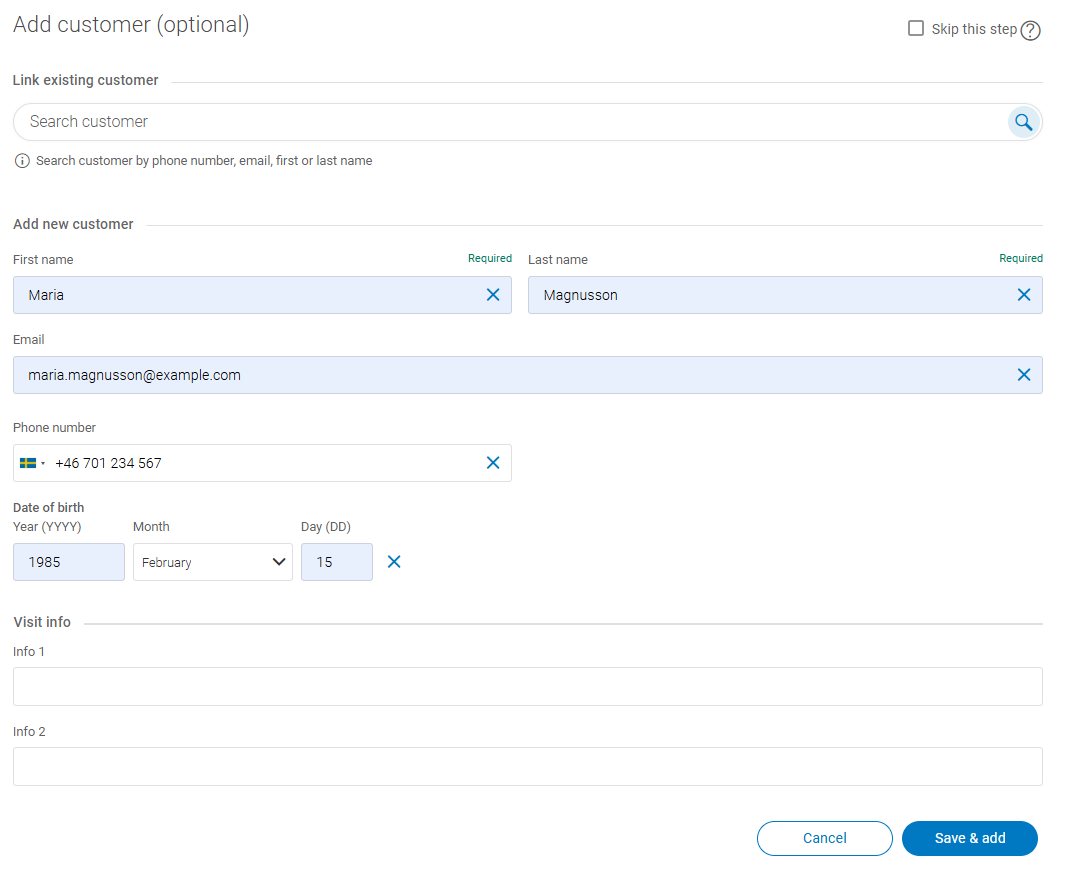
For each visit, there can be information about the customer, such as name, phone number, date of birth etc. You can configure how the customer information is handled.
Note
What customer data is visible depends on the Customer data collection preferences.
If you configure customer information settings in the Unit Type Template (UTT), make sure they are consistent with the Personal Data Management (PDM) settings. The system will always give priority to PDM settings over UTT configurations.
For more information, see Personal Data Management.
General customer info settings
Handle customer when Create Visit: Controls how customer information is stored when you add a customer information to a visit. Options:
Store customer in database: Customer data is stored as a customer object in the customer database. First and last name are required fields and date of birth may be required depending on settings
Store customer on visit: Customer data is stored on the visit object. All fields are optional.
Hide Customer banner: If enabled, the option to add customer information when creating a visit is hidden.
Hide Customer search fields: If enabled, you cannot search for customers.
Hide customer details: If enabled, customer details are hidden for appointments and visit. Instead, a customer ID is shown. Note that you can still enter customer information when creating visits and use customer information to find appointments to check in.
Birthdate Mandatory: Obsolete setting, does not apply to the Create visit flow
Note
The setting Hide customer field is obsolete since number of customers for an appointment is selected in the Book view.
Custom parameters
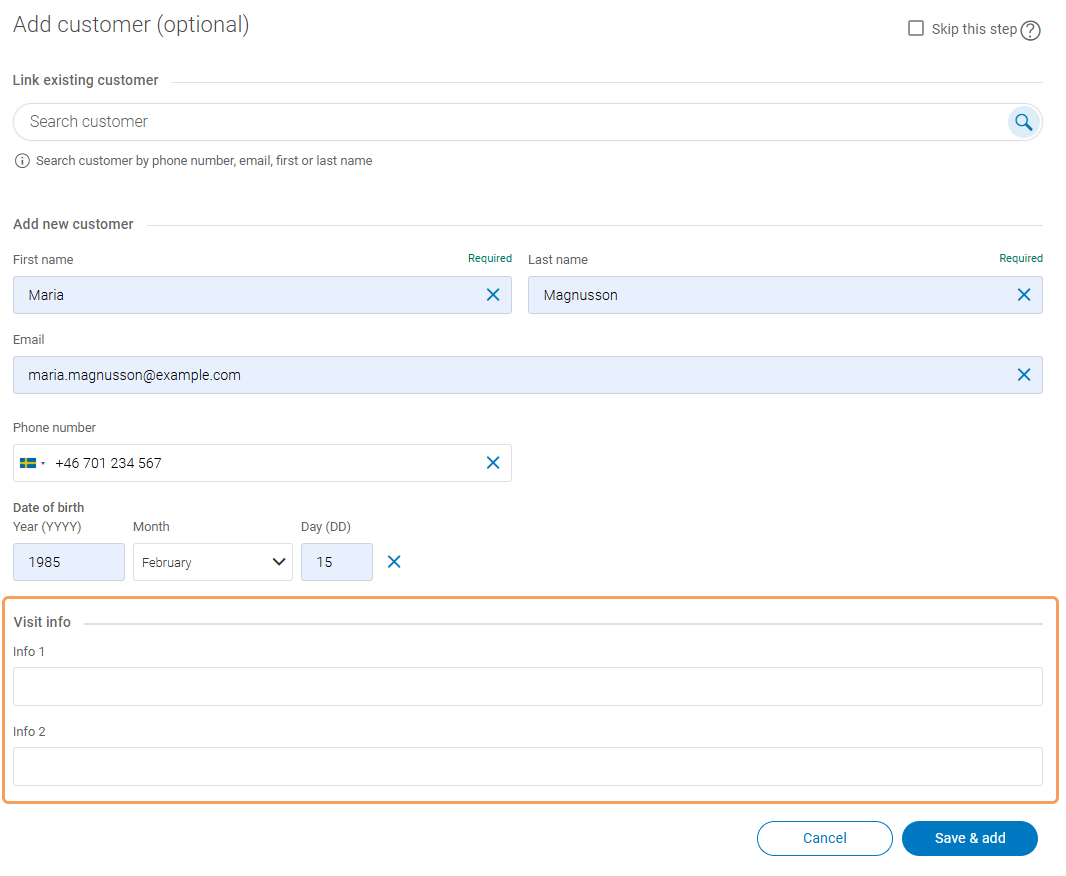
Custom parameters: Select which custom fields should be displayed. Custom2 will be displayed as Info 1, Custom3 as Info 2 etc (custom1 is reserved for notes).
Edit Custom parameters: Select which custom field should be editable.
Phone number settings
Country Code: The default country code shown in phone number fields. Enter the country code in numbers, e.g. +1, or the two-letter country code according to ISO 3166-1.
Preferred Countries: Favorite countries to display in the top of the list of country calling codes. Enter a comma-separated list of two-letter country codes according to ISO 3166-1 Alpha-2.
Card reader settings
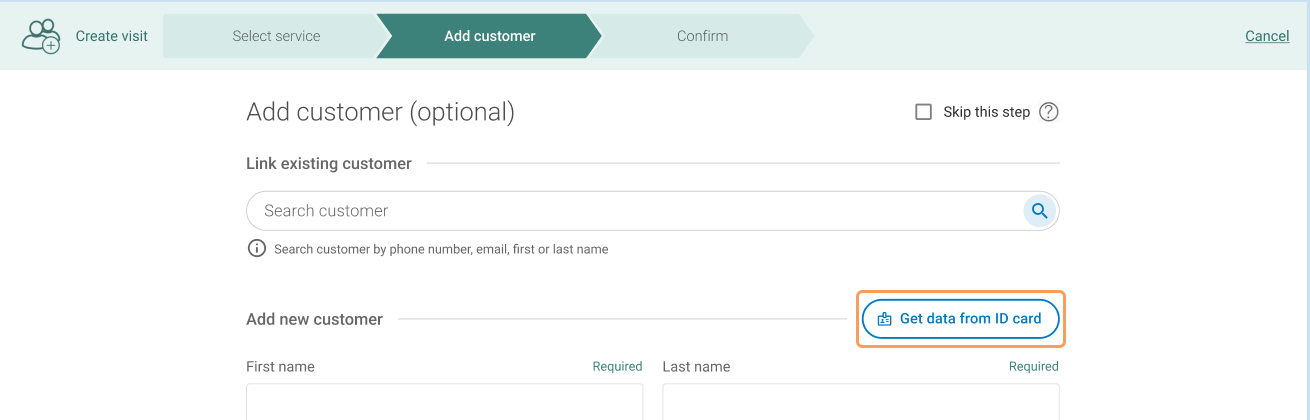
Card reader IP address: Card reader IP address which enables prefilling customer information field with data from a card by scanning it. Contact Sales if you want more information. NOTE: Located on branch level.
Level: Branch
Upon arrival, customers can get notified about their ticket number, get a link to Mobile Ticket, etc. The content of the message is edited in Notification Admin, but you can control which notification options are available.
Note
One of the settings Send SMS and Ticketless needs to be enabled.
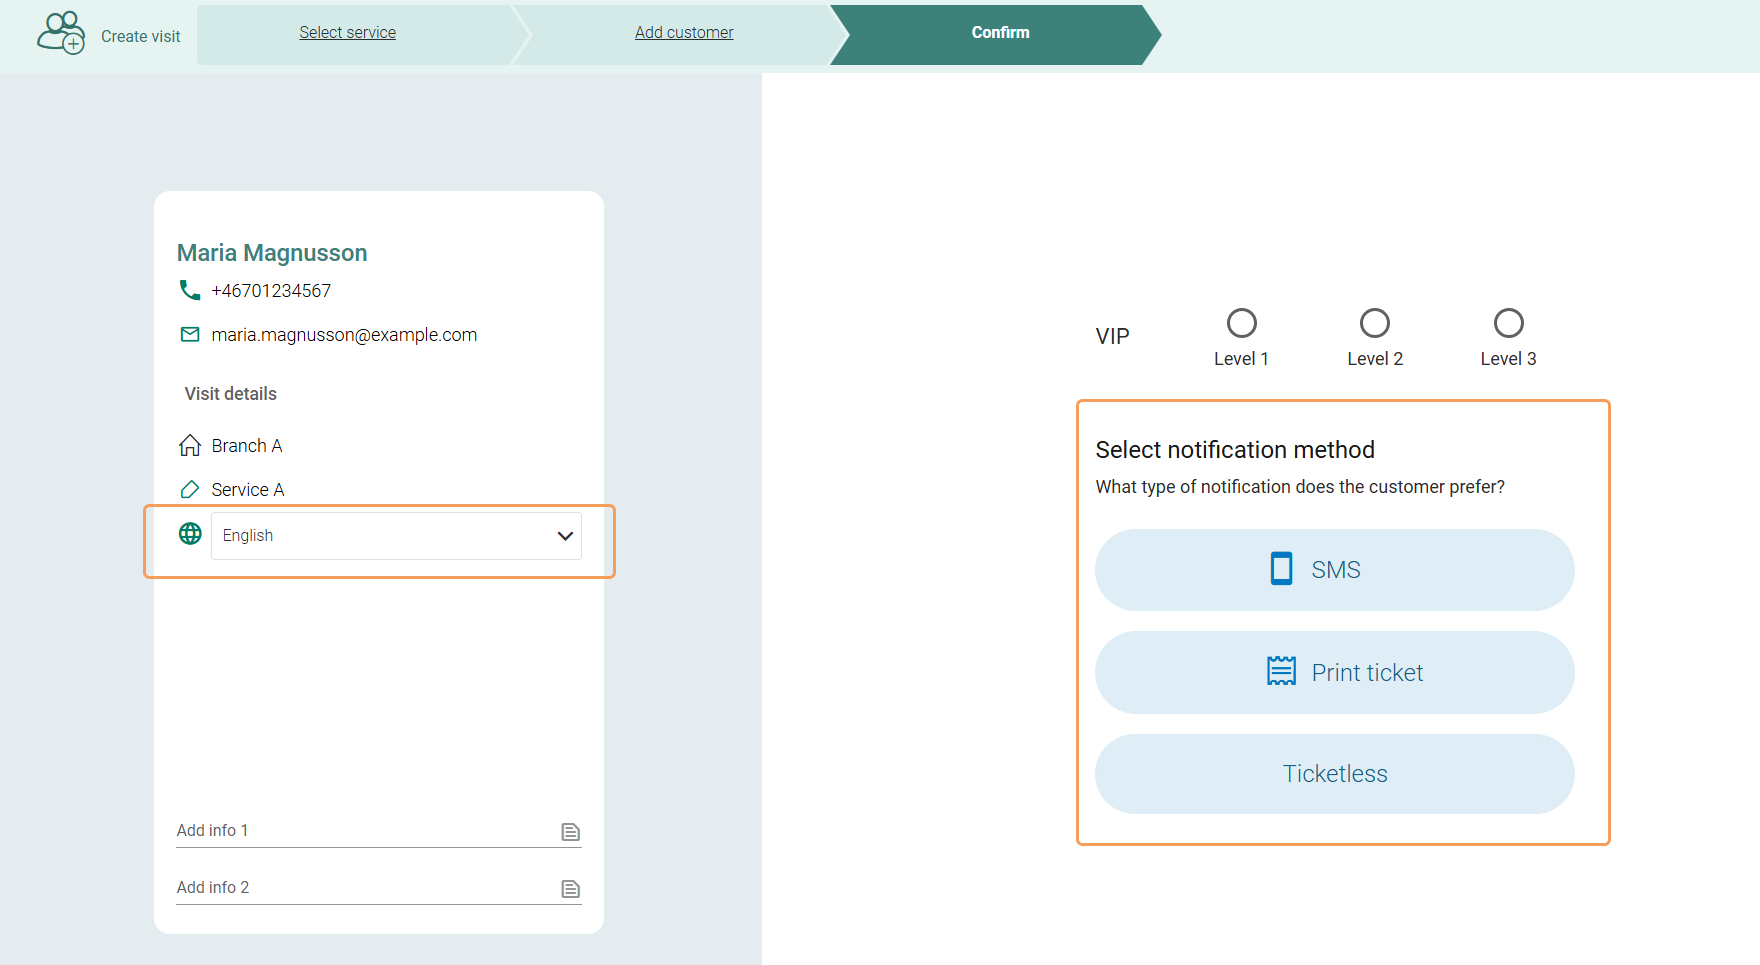
Send SMS: If enabled, staff can choose to send an SMS when creating a visit or checking in a customer. Is also enables the option to manually send an SMS during a visit.
Ticketless: If enabled, staff can choose to not send an SMS or print a ticket.
Notification language: If enabled, it's possible to select a notification language for a customer.
No Notification: Obsolete setting since this is for the Create appointment flow, which is now handled in the Book view.
Note
The setting Send EMAIL is obsolete setting since only SMS option is available when creating visits or checking in appointments.
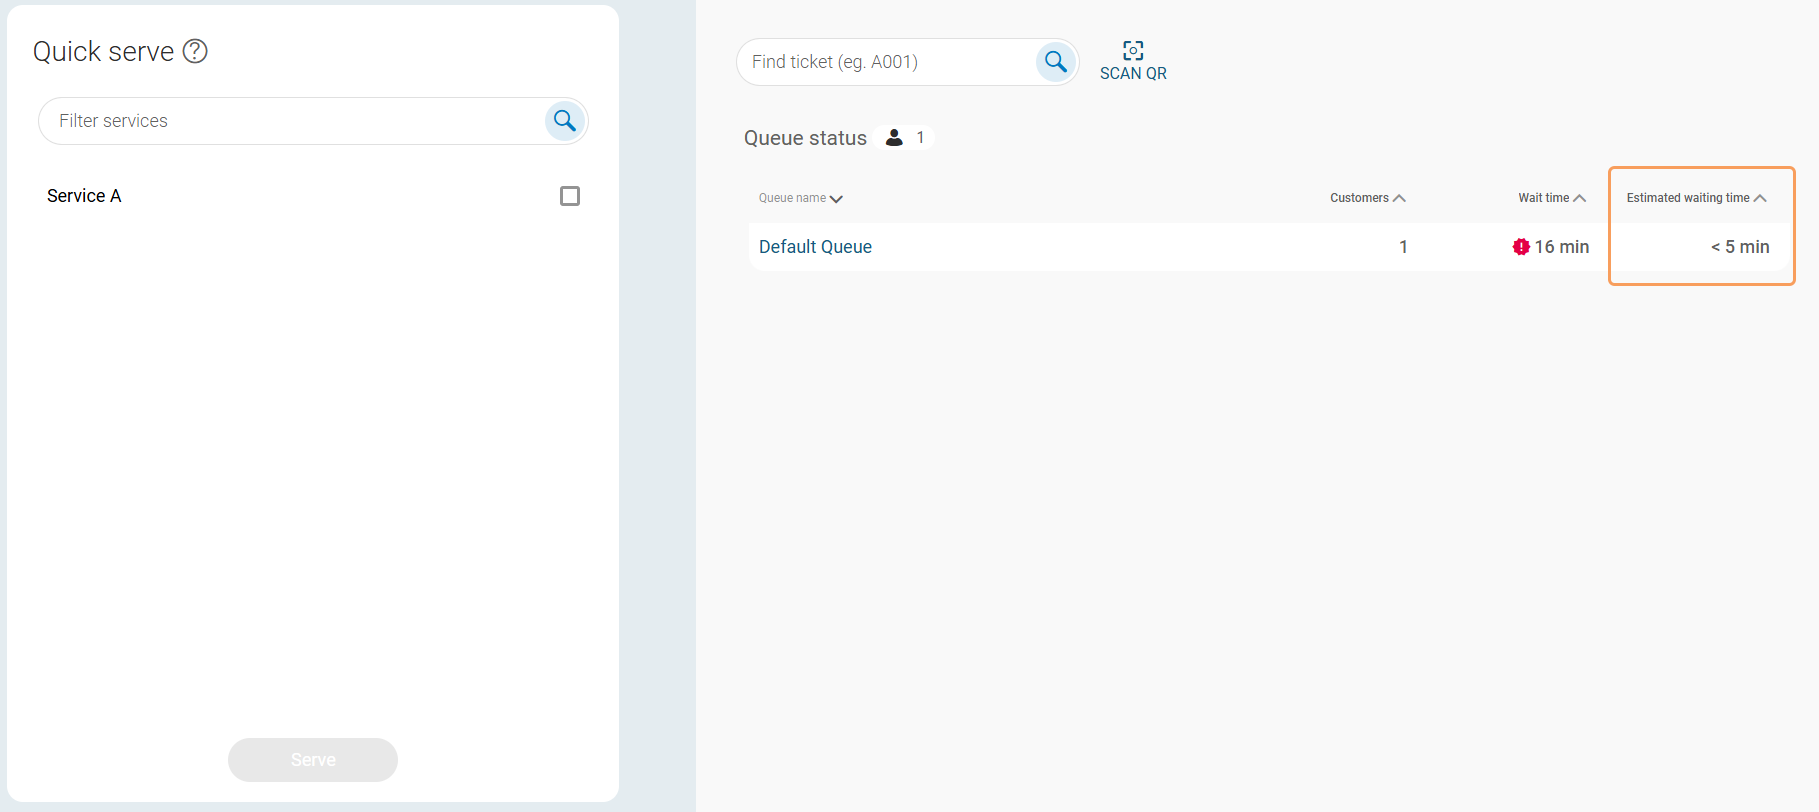
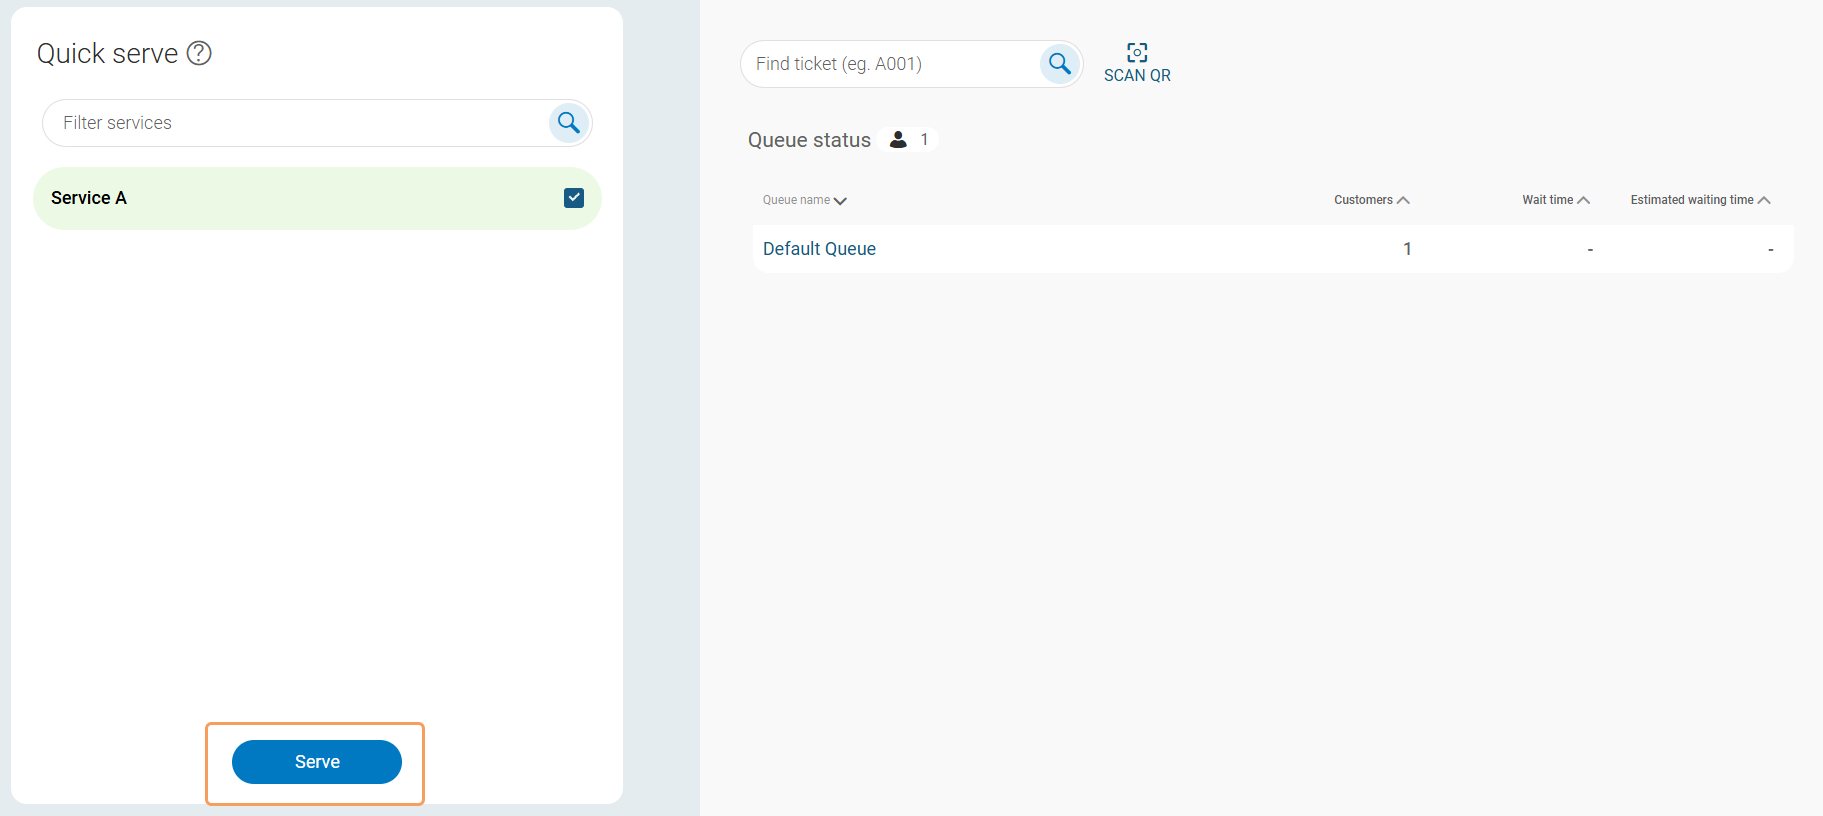
The estimated waiting time can be shown for each queue in the queue overview. The estimation is based on the serving time for each visit in the queue. If there are 3 visits in the queue for service A, which has a serving time of 10 minutes, and 1 visit for service B, which has a serving time of 20 minutes, the estimated waiting time for the queue would be 50 minutes. For the estimated waited time to be shown in the queue overview, at least one counter has to be open.
Estimated Waiting Time: If enabled, an estimation of the waiting time is shown for each queue.
If a customer checks in very early or very late, you can show a warning message to staff who is checking in the customer. They can then either choose to check in the customer anyway, or cancel the check-in. When staff checks in an early or late customer, the following pop-up appears after clicking Confirm in the last step:
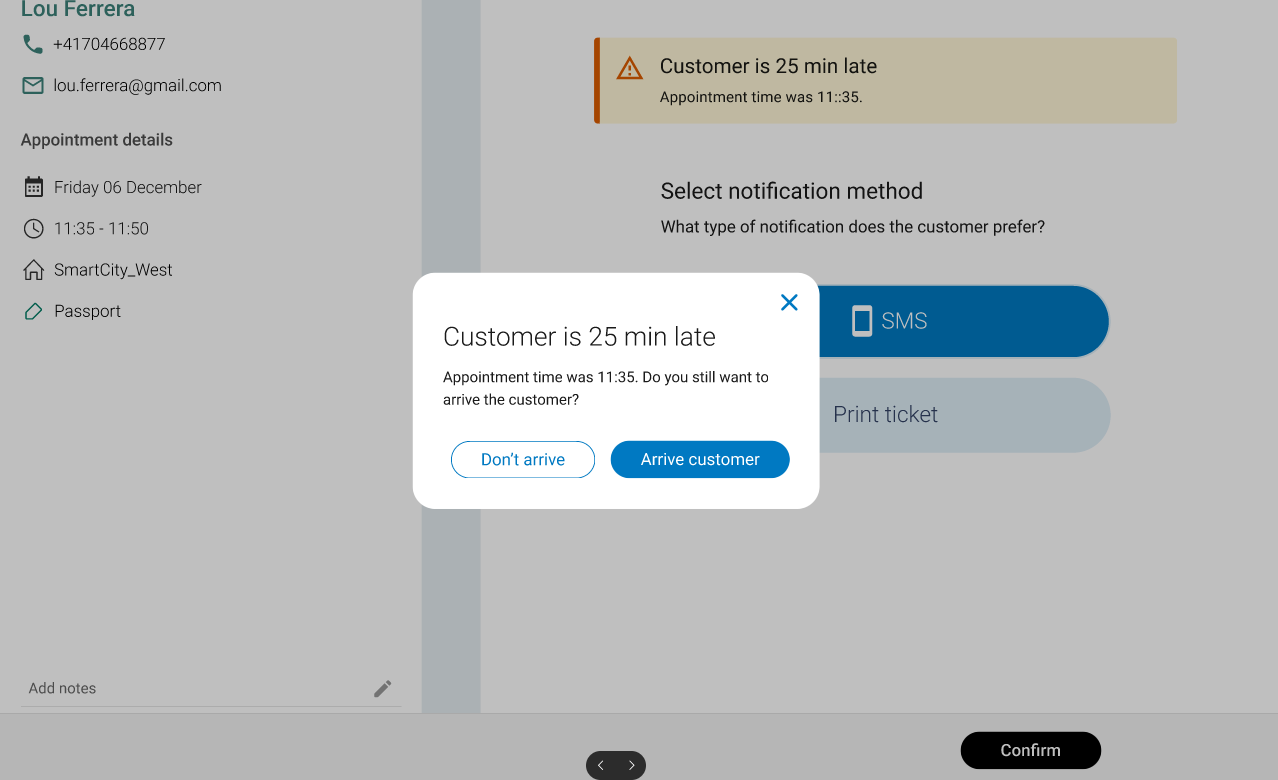 |
The limits for what counts as early and late can be configured with the following settings:
Early check-in warning (min): Threshold value in minutes that triggers the warning that the client has checked in early. Leave empty to disable the warning.
Late check-in warning (min): Threshold value in minutes that triggers the warning that the client has checked in late. Leave empty to disable the warning.
You can control which flows and views are available. The following settings exist:
Arrive Appointment Flow: Controls whether the flow for checking in customers is available.
Create Visit Flow: Controls whether the flow for creating a visit is available.
Quick Serve/Create/Arrive flow: Sets which flow is available the Check in landing page. Options (you can only select one of them):
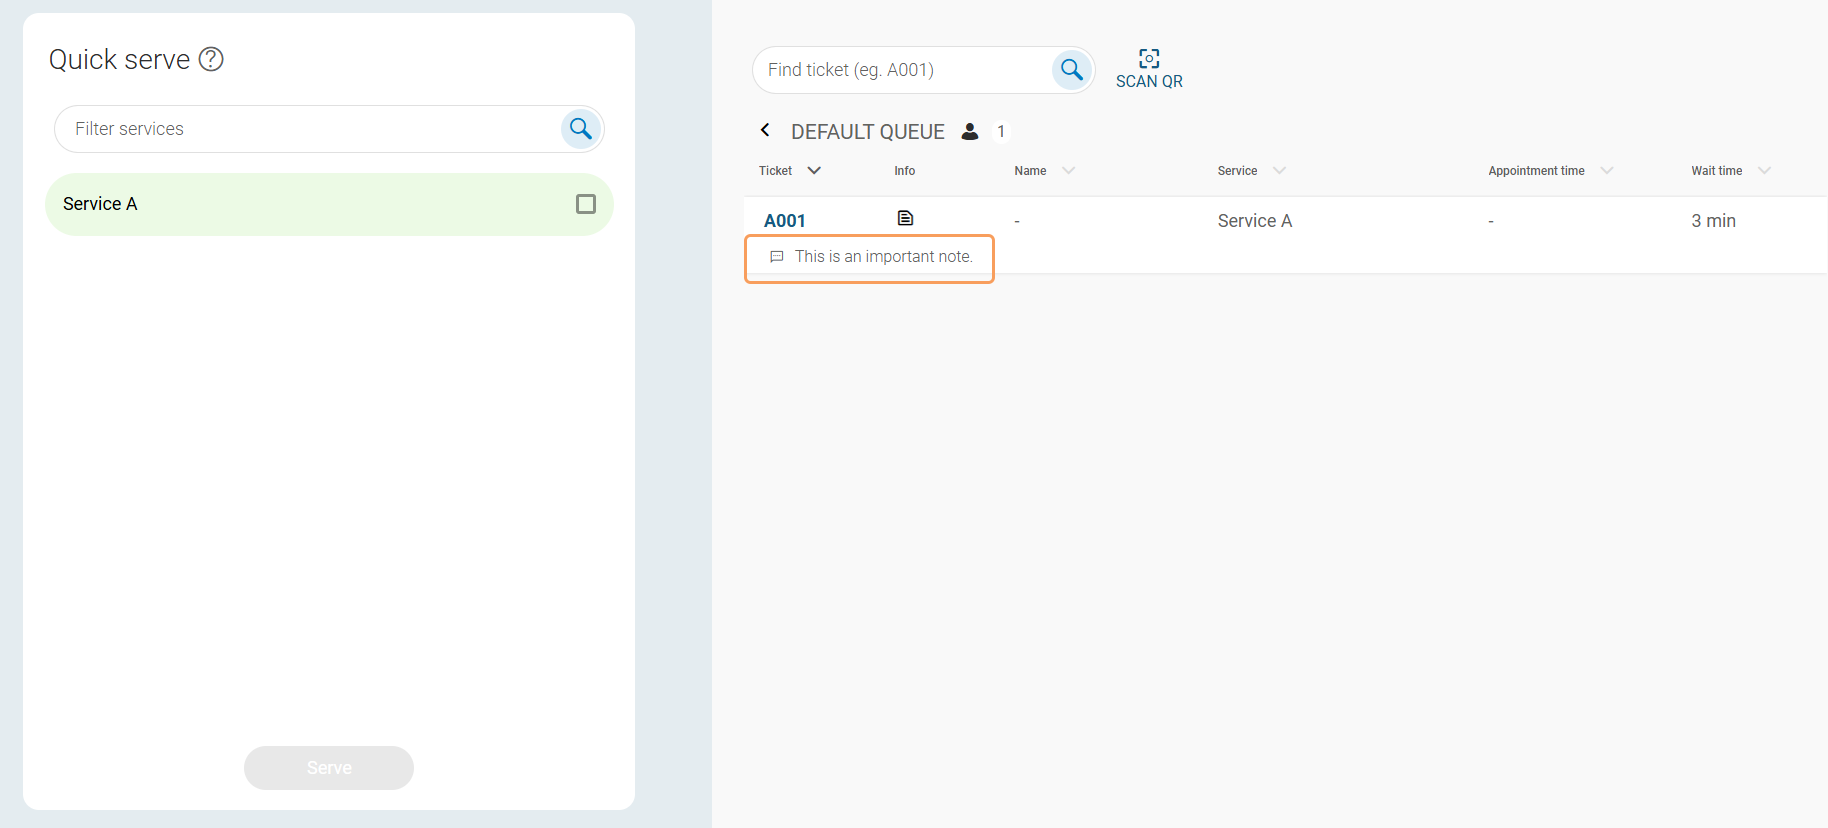
Quick serve: A way to register visits that were handled instantly. By selecting a service and clicking Serve, a visit is both created, called and ended. Quick serve is primarily used for statistical purposes.
Quick create: Allows creating visits with just two clicks.
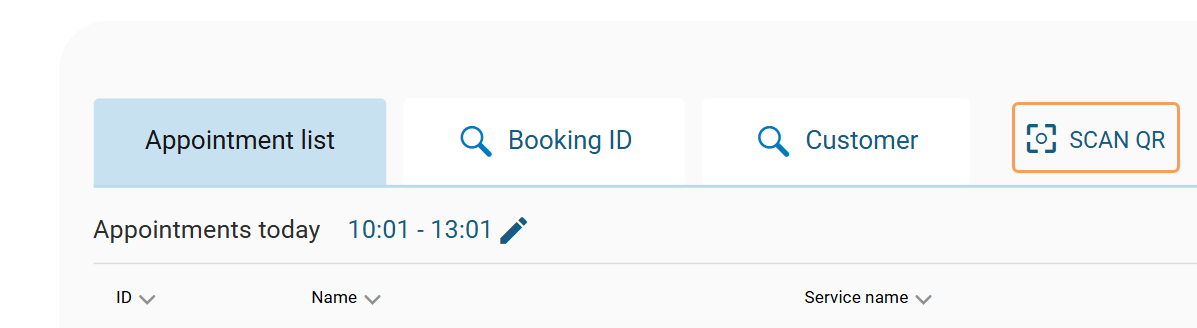
Quick arrive: A way to quickly check in appointments by scanning a QR code.
None
Quick serve / Quick Create Included services: Controls which services that appears in the Quick Serve / Quick Create list. If no services are selected, all services are listed (for Quick Serve, services that have a delivered service or outcome are excluded).
Queue View: Controls whether the queue view is shown.
Note
The settings for Create appointment flow and Edit appointment flow are obsolete since those functions are handled in the Book view.
You can configure which options are available when creating and managing visits.
Remove Visit: If enabled, visits can be removed (deleted) from a queue.
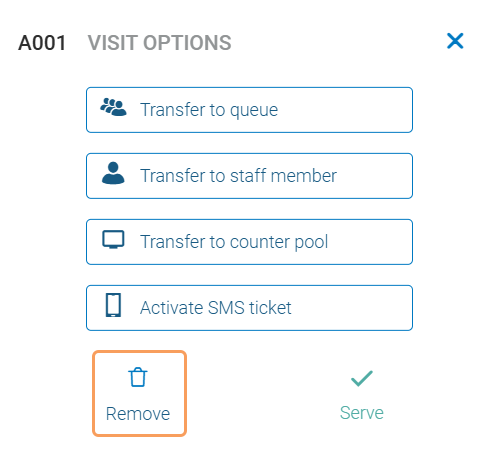
Serve Customer: If enabled, the Serve button is available for visits. This means the visit can be marked as served and is thereby ended.
Rearrange services: If enabled, the order of services can be changed when creating a visit.
VIP 1, VIP 2, VIP 3: Controls which VIP levels are available. VIP levels can be used to segment visits in to different queues.

Note
The settings Re-schedule appointment and Remove Appointment are obsolete since those actions are now handled in the Book view.
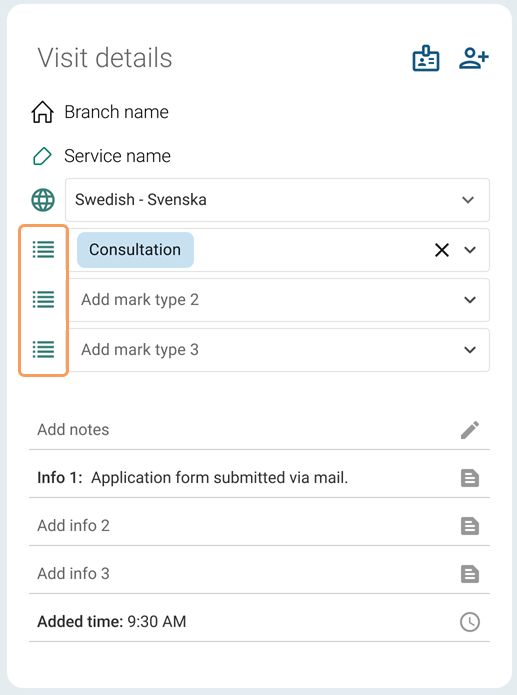
The following settings are related to marks:
Enable marks: Controls whether it's possible to add marks. The following options are available:
No item selected – Marks are not available in the Create visit flow.
Optional – Marks are available in the Create visit flow, but not required.
Mandatory – Marks must be added in the Create visit flow. It is not possible to create a visit without selecting at least one mark.
Level: Equipment profile
Marks type: If Enable marks is set to Optional or Mandatory, you need to use the Marks type field to define the mark types that are available during check-in. There are three ways to configure this:
*: selects all mark types (except for NPS, the system default mark type for Net Promoter Score)
Marktype1, Marktype2: selects only the entered mark types
Exclude: Marktype1, Marktype2: excludes the entered mark types
Note
If you leave the Marks type field empty, the system uses a placeholder text (“Marks”). If Enable marks is set to Mandatory and no mark type called Marks is defined, it will not be possible to complete the Create visit flow.
Mark types are managed in the System administration module.
Note
Using a combination of methods is not supported.
Level: Equipment profile
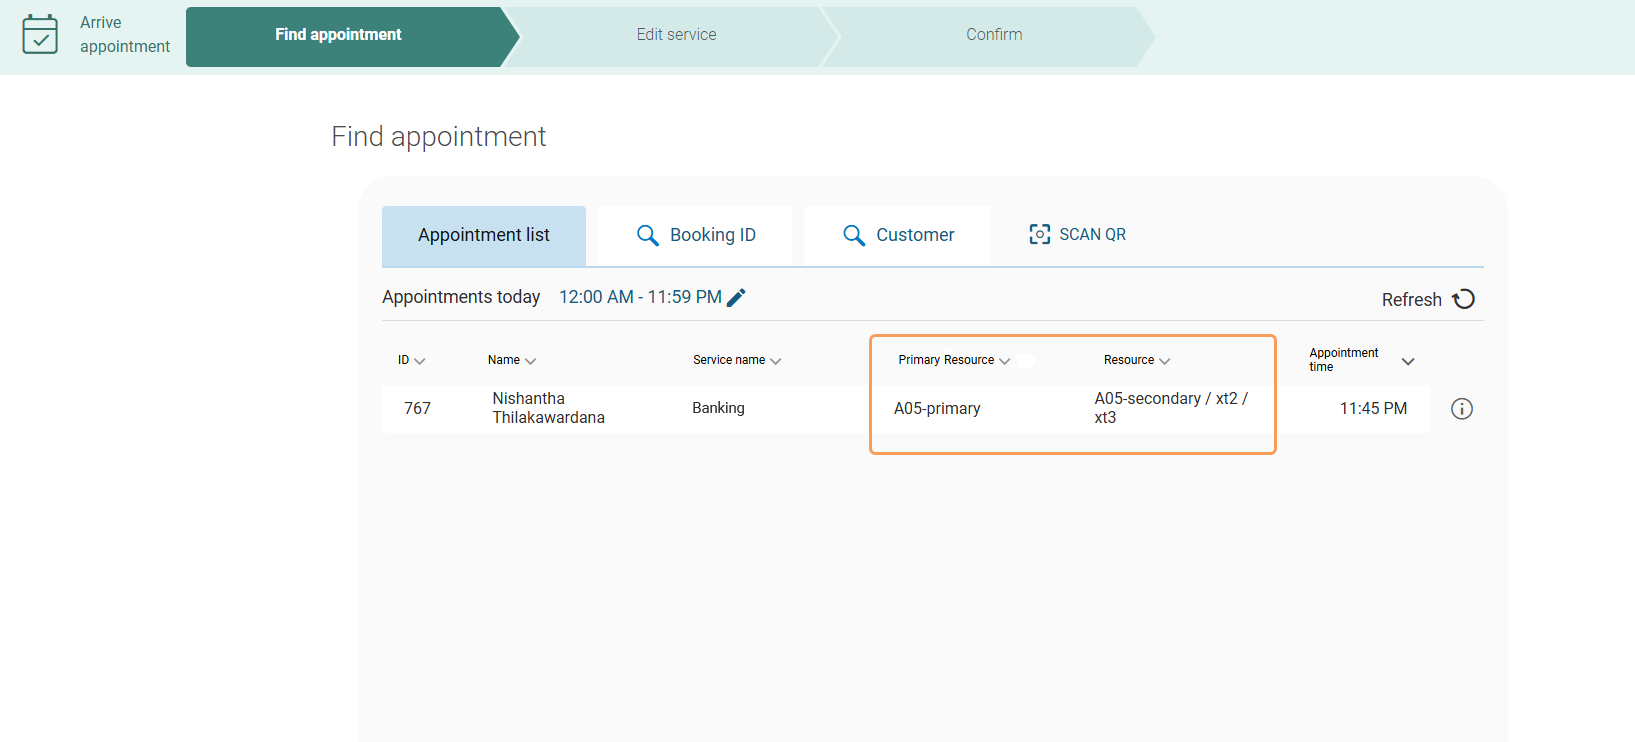
Identify Appointment QR Code: If enabled, staff can find a particular appointment to check in by scanning a QR code.
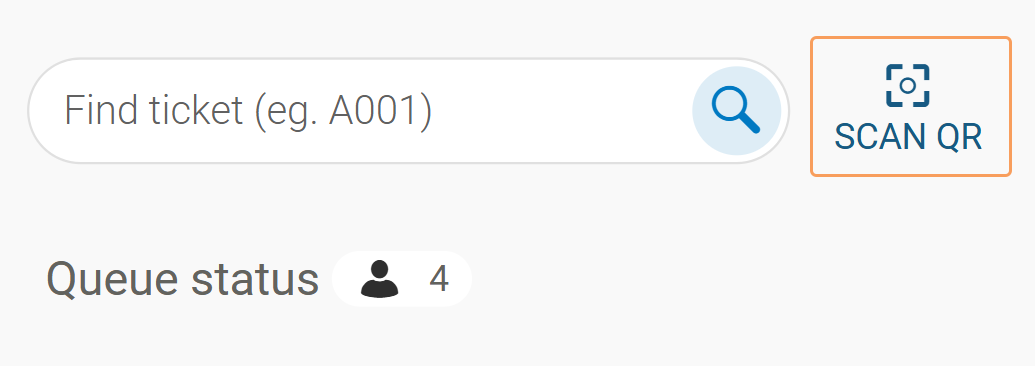
Identify Visit QR Code: If enabled, staff can find a particular visit by scanning a QR code.
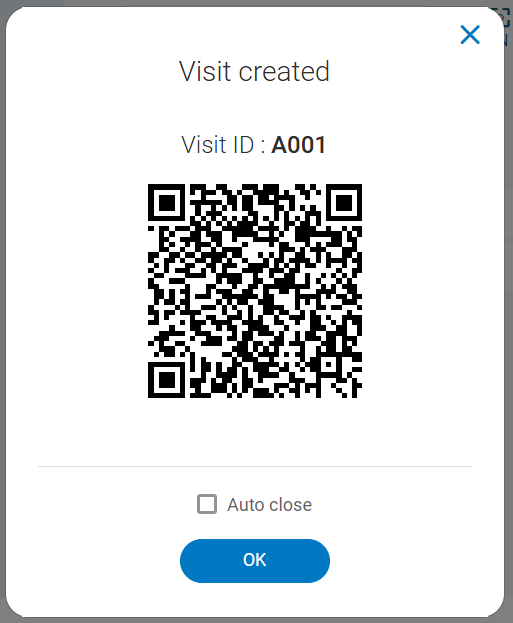
QR Code for Mobile Ticket: If enabled, a QR code for accessing the visit in Mobile Ticket is shown when a visit is created.
Primary resource: If enabled, the primary resource for the appointment is shown.
Level: Branch
Secondary resource: If enabled, the secondary resource for the appointment is shown (if any).
Level: Branch
You can allow staff to see and edit the notes for a visit. All notes are deleted when a visit is finished. The following settings related to notes exist:
Notes: If enabled, notes are visible and can also be edited.
Notes full view: If enabled, notes are shown in full view in the visit list.
The following setting controls when a user is automatically logged out:
Auto close: Users are logged out after this time of inactivity (seconds). After the set time, the user is asked if they want to stay logged in. A timer start counting down, and if the user doesn't choose to stay logged in, they are logged out. Default value: 1800.
When starting the flow for checking in appointments, you see a list of upcoming appointments. By default, appointments scheduled 1 hours before and 2 hours after the current time are shown, but these values are configurable.
Appointment Fetch start (min): Number of minutes before the current time that appointments should be fetched. Default: 60.
Appointment Fetch End (min): Number of minutes after the current time that appointments should be fetched. Default 120.
Fetch appointments: If disabled, no appointments are fetched automatically and the user has to actively set a time interval.
Send appointment stat event: If enabled, custom stat events are sent for appointment origin. Use only if you want statistics on where an appointment was created since custom events will break the aggregation of appointment data over time.
Reconnect timer: In case of weak network, this timer indicates how long time the app will keep trying to reconnect. Default is 15 minutes.